Marie Browning

"Inspiring and honoring creativity"

Blog Hop with Guest Designer Diana Larson September 12, 2014


Welcome to the blog hop with guest designer Diana Larson! If you just came from Jennie’s Blog you are on the right track! if not, you may want to go back to the start at the Tombow Blog

IMG_1175

It’s harvest time! My bushes and trees are just loaded with fruit this year, grapes, apples and scarlet runner beans will be processed into grape jelly, applesauce and mustard beans this weekend! In honor of the harvest I made a quick DIY home project with pear shaped crystals from Connie Crystals and Tombow Adhesives! 

IMG_1171

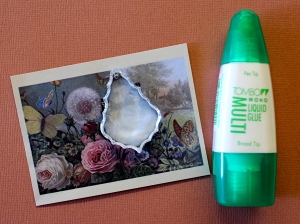
These are so simple to make! Add a little bit of the Mono Multi Liquid Glue onto the back of a crystal and place onto your image. Let dry crystal clear and trim away the excess paper.

IMG_1173

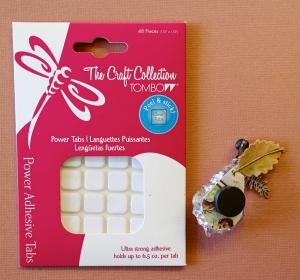
I hung some of the crystals on chain with a clip at the top to hang from lamps, use as fan pulls or just to display in a window. I think I may even put one in my car! I used 1/2 of a Power Tab to attach the velvet leaf onto the back.

IMG_1177

Some I made into magnets to use in my office on the filing cabinet. One Power Tab is plenty strong enough to attach the magnet to the back.

IMG_1172

Aren’t they great? I think they would make great gifts for friends at your office as well!

Blog Hop_DL

In order to qualify to win this amazing prize, Mono Aqua Liquid Glue and an Irojiten Color Pencil Sepia 5 set, please comment on each of the designer’s projects! The lucky winner will be announced on Monday Sept 15. 

Now go to our quest designer, Diane Larson’s Blog to see what fabulous project she has created for you! Happy Blog Hopping!

 

Birdcage Crystal Mobile March 3, 2013

This beautiful mobile combines paper crafting and basic jewelry making skills. What holds it all together are Tombow adhesives to form a decorative mobile to hang where a little vintage twinkle is needed.

Using the Caged Bird Die cut from Sizzix, cut out four birdcages from a dark brown cardstock. Trim off the center bar in the cage and adhere the cage down to decorative cardstock using Dot Adhesive Stamp Runner. The Dot adhesive is perfect for detailed cuts like the cage, it only deposits the adhesive onto the raised, cut areas making sure you get a secure bond with no messy bits exposed.

Cut the cages from the decorative paper and fold in half lengthwise. Using MONO Multi Liquid Glue, glue the folded pieces together. Before adding the last piece, glue in a loop pin to the top and the bottom of the cage.

To create a base for the floral piece, punch out two pieces. This is not really seen in the final piece, so you can chose any shape that measures around 2″ square. Using the Multi Glue, glue in two loop pins as shown, then glue the pieces together.

The floral embellishments are attached to the base using Foam Tabs and Power Tabs. I colored the paper flowers and lace piece with Dual Brush Pens and then spritzed with water to make the colors blend. The ribbon rosette was made using Multi glue and a Power Tab. The crystal pins were made by gluing crystal beads to head pins with the Multi glue.

The birds is made by gluing with Multi Glue two bird pieces together with a loop pin sandwiched in between. The bird is made 3-D by attaching the wings with Foam Tabs. Hang the mobile at this point to make sure all the pieces balance as you add them. Using chain, jump rings, charms and crystals from Connie Crystals, to make the dangling pieces. Attach them to the cage and the bottom of the floral piece.

If you enjoyed this post please follow us on: http://www.facebook.com/tombowusa and http://twitter.com/#tombowusa