Marie Browning

"Inspiring and honoring creativity"

Blog Hop with Guest Designer Diana Larson September 12, 2014


Welcome to the blog hop with guest designer Diana Larson! If you just came from Jennie’s Blog you are on the right track! if not, you may want to go back to the start at the Tombow Blog

IMG_1175

It’s harvest time! My bushes and trees are just loaded with fruit this year, grapes, apples and scarlet runner beans will be processed into grape jelly, applesauce and mustard beans this weekend! In honor of the harvest I made a quick DIY home project with pear shaped crystals from Connie Crystals and Tombow Adhesives! 

IMG_1171

These are so simple to make! Add a little bit of the Mono Multi Liquid Glue onto the back of a crystal and place onto your image. Let dry crystal clear and trim away the excess paper.

IMG_1173

I hung some of the crystals on chain with a clip at the top to hang from lamps, use as fan pulls or just to display in a window. I think I may even put one in my car! I used 1/2 of a Power Tab to attach the velvet leaf onto the back.

IMG_1177

Some I made into magnets to use in my office on the filing cabinet. One Power Tab is plenty strong enough to attach the magnet to the back.

IMG_1172

Aren’t they great? I think they would make great gifts for friends at your office as well!

Blog Hop_DL

In order to qualify to win this amazing prize, Mono Aqua Liquid Glue and an Irojiten Color Pencil Sepia 5 set, please comment on each of the designer’s projects! The lucky winner will be announced on Monday Sept 15. 

Now go to our quest designer, Diane Larson’s Blog to see what fabulous project she has created for you! Happy Blog Hopping!


Custom Colored Blossoms April 14, 2014

Here’s a hint to make beautiful custom colored blossoms for your paper arts and mixed media creations using the Dual Brush Pens!

IMG_3031Start with a white paper flower, any size or shape. When I do this technique I usually do a bunch with lots of different colors so I have them ready made whenever I need them.

IMG_3032Add the color to the blossoms. You do not need to color solid, just add a few lines and have fun combining different shades.

IMG_3033With a mister, spray the blossom with water, or for a sparkling blossom, use a gold or silver glitter mist. Let the blossom dry completely.

IMG_3034When dry, layer different sized blossoms and a fun decorative center using the Mono Multi Liquid Glue.IMG_5872 IMG_5860 IMG_5861 Welcome spring flowers!


Blog Hop with Cabio Tse December 9, 2013

The Tombow Design Team is blog hopping this week with talented guest designer Cabio Tse. If you just came from Jennie’s blog you are on the right track! If not, and you want a chance to win a prize, go back to Tombow’s Blog and follow the projects!

IMG_2380I have long admired vintage shadow boxes, and decided to create some to hang on the tree this season. Authentique Papers inspired this project, along with this beautiful quote printed on their cardstock;

“We have only this moment, sparkling like a star in out hand and melting like a snowflake” Marie Ray

IMG_2353I constructed the shadow box using corrugated cardstock and the gorgeous winter themed cardstock from Authentique’s Glistening Collection. The box was put together using Multi Liquid Glue for a nice strong bond.

IMG_2355

IMG_2356To create the snowy scene, I glued in pulled-apart cotton balls using Aqua Liquid Glue. I then dribbled Aqua glue all over the ‘snow’ and sprinkled with vintage clear glass glitter. A few drops of Multi glue on the bottle brush trees and miniature deer held the winter scene together.

IMG_2381

IMG_2384Here are two more vintage box designs – they were so fast and fun to put together!

Blog Hop_CT

Enter to win these great Tombow Products! MONO Multi Liquid Glue, Irojiten Colored Pencils, MONO Removable Adhesive and MONO Removable Adhesive Refill. Make sure to comment on all the Design Team’s projects! The winner will be announced Friday Dec. 13 at 3:30 pm EST.

Now go to Cabio’s Blog to see what wonderful project she has created!


Debbie’s Pink Challenge October 17, 2013

IMG_2007

Here is my post for Debbie’s Pink Challenge! Debbie is a member of our Tombow Design team and you can follow her blog here.  I created a pink card using Dot Adhesive Stamp Runner to adhere the panels and Power Tabs to attach the paper flowers and silk ribbon bow. Mono Multi Liquid Glue was used to add rhinestone centers to the flowers.

Debbie_pinkStamp Runner Dot Pattern Adhesive

Mono Adhesive Dots

Dual Brush Pen 703

Dual Brush Pen 725

Dual Brush Pen 761

Irojiten Color Pencil Cameo Pink

Irojiten Color Pencil Rose Pink

Irojiten Color Pencil Plastic Pink

Look at all the wonderful pink Tombow Products you can win by playing along and creating something pink!

Go to Tombow’s Blog for Contest details!  Entries are due by October 2oth at noon EST. Voting Begins October 21st and ends October 22nd at 3:30 EST. We will announce the Winner via our Facebook Page. Good Luck!


Blog Hop with Tifany DeGough September 9, 2013

This week I am blog hopping with the amazing Tifany DeGough and the fabulous Tombow design team! If you just came from Jennie’s blog you are on the right track!

IMG_1769Here are some sneak peeks into my video projects I did featuring Tombow products for JoAnn’s in Akron, Ohio recently. We taped a series of six videos and when they are edited and uploaded I will share them with you! The production staff were a great group to work with!  I also received a very warm welcome from shuttle drivers, hotel staff and generally everyone I met in Ohio.  This photo shows a sparkly snowflake ornament that used Mono Multi Liquid Glue, Mono Aqua liquid glue, Foam Tabs and Power Tabs.

IMG_1745These pleated rosettes adorn a Vintage Bulletin Board and used Mono Multi Liquid Glue, Removable Adhesive and Power Tabs to create.

IMG_1752These brightly colored and template free containers are also created with Mono Multi Liquid Glue along with Dot Adhesive Stamp Runner and Power Tabs. These projects, complete with instructions, will be online soon! Make sure you follow JoAnn Store’s Facebook Page and me for these and many other creative projects!

Blog Hop_TGMake sure to comment on all the posts this week and win this great prize from Tombow! You could be the happy winner of Tombow’s Power Tabs, Mono Multi Liquid Glue and Dot Adhesive Stamp Runner! Now go to Tifany’s Blog to see what wonderful project she has created for you!

If you enjoyed this post please follow me on:

Facebook facebo

Twitter
twitter


“It’s Tombow time to get Fancy Pants” Blog Hop September 2, 2013

HGL_2028_CollectionPack_RGB_576x576_72pdiWelcome to the Tombow and Fancy Pants Blog Hop! If you just came from Tombow’s Blog you are on the right track! It was hard to pick from Fancy Pant’s new cardstock collections! I love them all! I choose the Happy-go-Lucky Collection for my card design, but I know I can use the other collections with the same design!

IMG_1793I come from a large family with lots of young adults. So when birthdays come along, it’s usually money or event tickets for their gift. I love to include a handmade card with a pocket inside. A folded flap with the sides adhered down with the Dot Adhesive Stamp Runner makes a nice, easy double pocket inside the card. On one side, a tag with the greetings and on the other, the folded money or tickets. I used the stickers, labels, border stickers and cardstock from the Happy-Go-Lucky collection, everything goes together perfectly!  Yes, that is a million dollar bill, I’m very generous…

IMG_1791The front of the card is decorated in the same manner using the coordinating papers and stickers. The focal point is a rosette cut using the Tim Holtz Rosette die from Sizzix. When cut, accordion fold and glue the ends together with Mono Multi Liquid Glue. You need only a small touch and it sticks together instantly and securely. After pushing down into the rosette, the Power Tabs, one for each side, holds it together perfectly and provides the means to stick it to the card.

IMG_1794Don’t forget to make a  matching envelope!

Blog Hop_FPMake sure to comment and like both Fancy Pants and Tombow to win this prize of a Dots Adhesive Stamp Runner, Power Tabs and Foam Tabs!

Fancy pants will also be giving away the new Happy-Go-Lucky Collection!

Your next stop: the Fancy Pants Blog!


Adventures Photo Box by Marie Browning June 13, 2013

Tombow_imaginisce_summer

Welcome to the Imaginisce/Tombow “Summer isn’t a Bummer” Blog hop! This is the final day of the hop and we’re so glad you’re with us! This week, Imaginisce and Tombow have teamed up to get you in the summer spirit.  Both design teams are excited to show you just what we have done with the Hot Rocks as well as My Endless Summer and Outdoor Adventure collections from Imaginisce, and Tombow’s Dual Brush Pen Markers and amazing adhesive products. I am the first person on Today’s hop!
IMG_1395
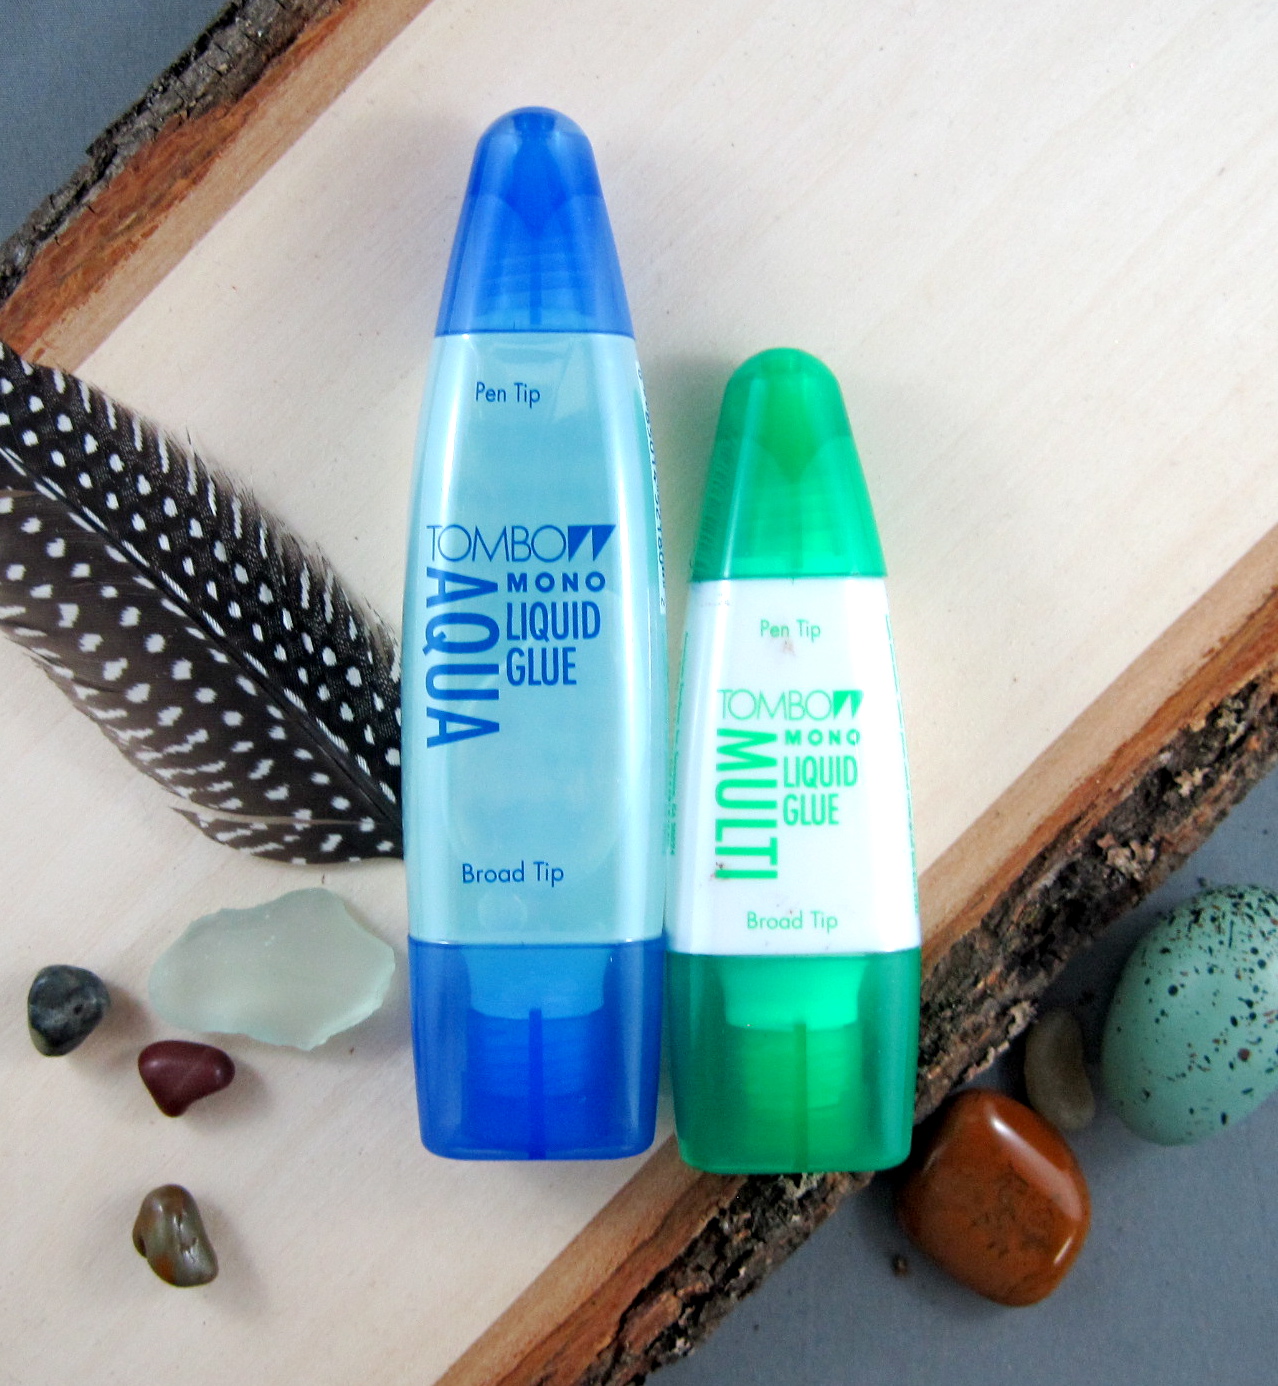
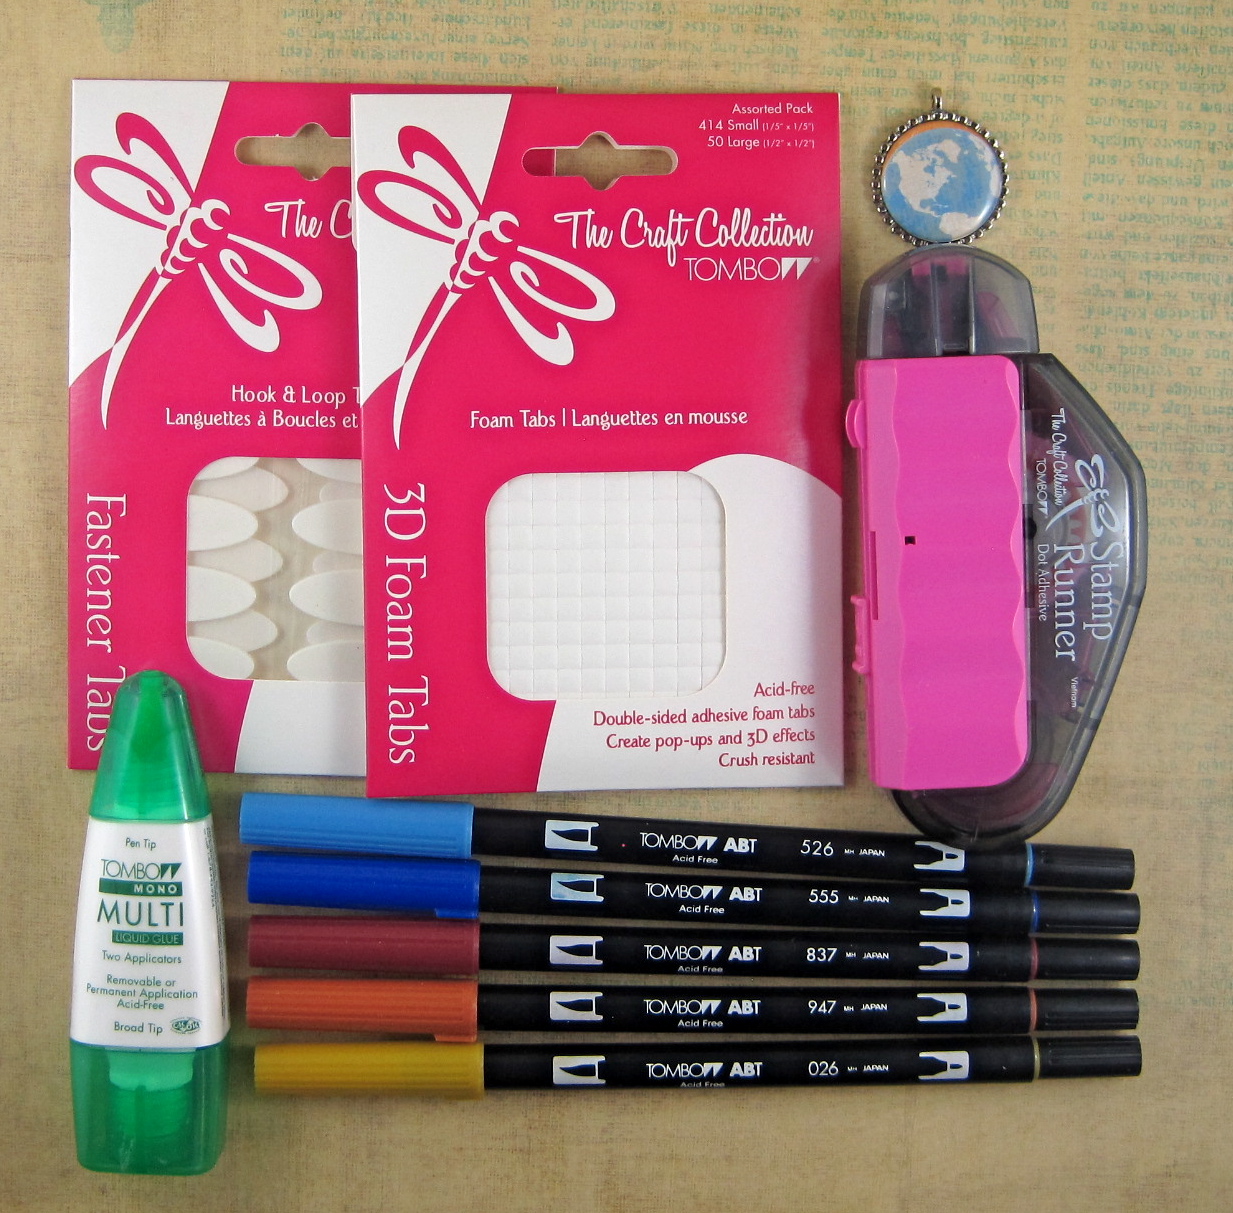
For my post I am using the wonderful Outdoor Adventure papers and stickers from Imaginisce along with Tombow’s liquid Glues. I wanted to do something different with the papers and I decided on a photo box to hold photos from family adventure vacations. The papers were perfect for this and there were loads of stickers and die-cuts from the collection to choose from. I choose the papers to cover both the outside and inside of the box and both sides of the lid, trimming each panel  1/4″ smaller. I then used a coordinating acrylic paint and painted every edge on the box and lid. All the panels are attached using Mono Aqua Liquid Glue from Tombow, my go-to glue for paper onto wood. It goes on clear, dries clear with a matte finish and with no wrinkles! It also has the advantage of a brush applicator so no messy brushes or washing up!

IMG_1396
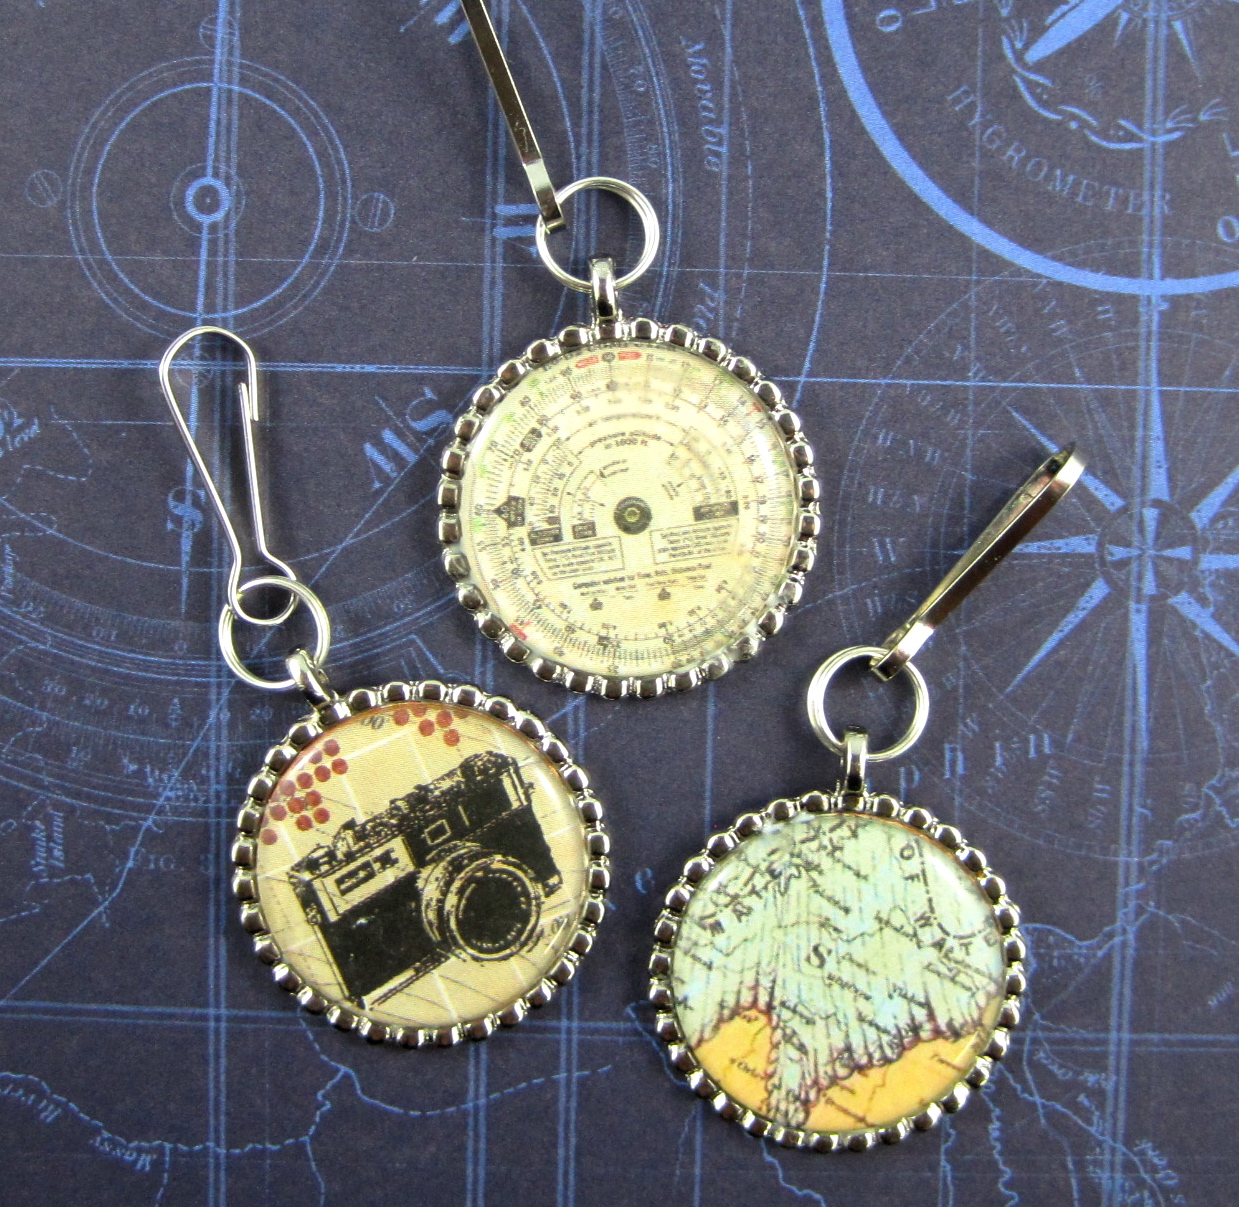
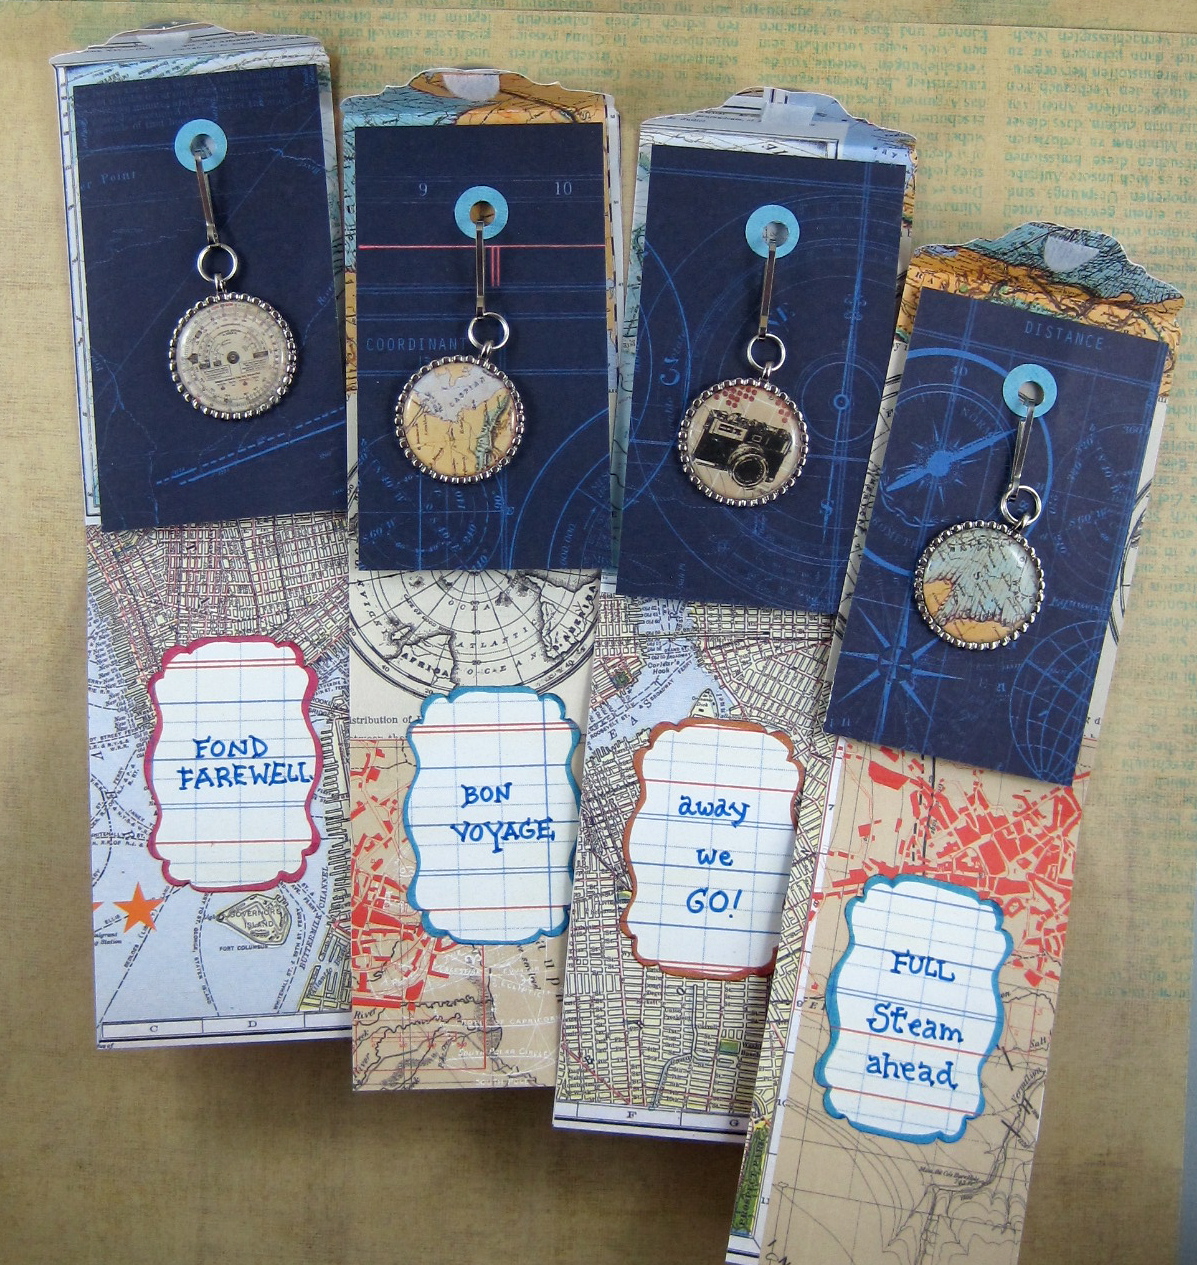
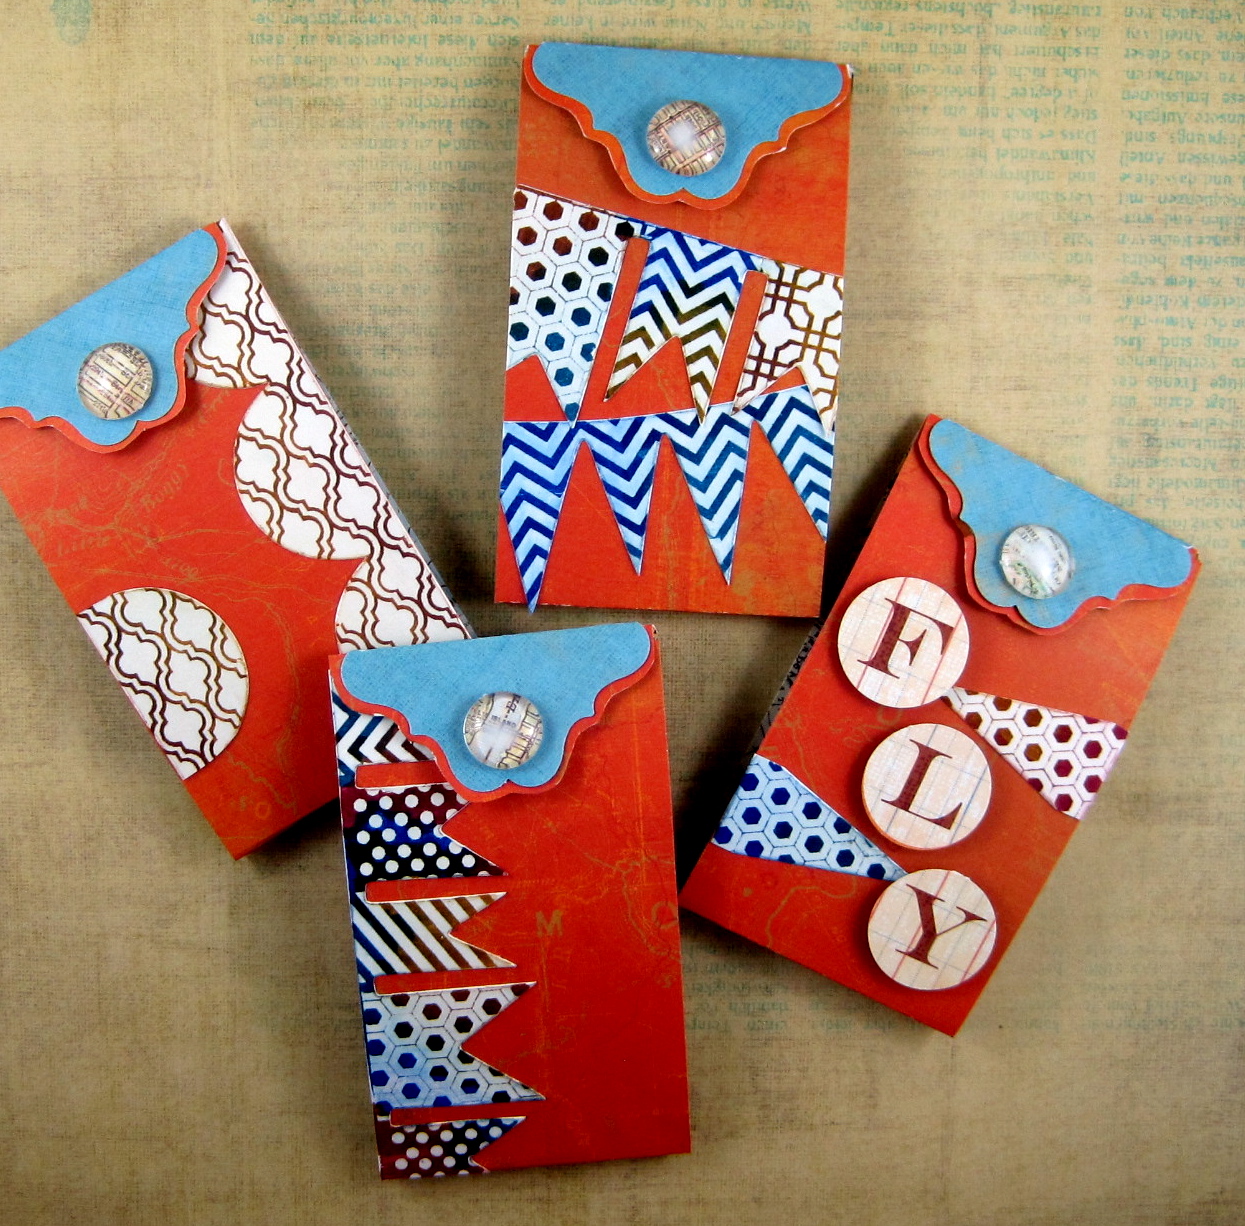
I then designed some  ‘title divider ‘ pages to separate the different years and adventures of photos. Each divider was trimmed from the Outdoor Adventures paper to fit into the box. I then decorated the front of each divider with a photo from that year  and stickers from the collection. The photos are attached using Tombow’s Dot Adhesive Stamp Runner. It allows me to use it as a traditional stamp runner around the edges and also ‘stamps’ small squares of adhesive in the middle of the photo. I attached the little date tags at the top using Mono Multi Liquid Glue for a super strong hold for these soon to be tugged on pieces!

IMG_1398On the back side of each title divider page, I added journal tags and die-cuts from the Outdoor Adventure Collection, ready to add the details. Again, the Dot Adhesive Stamp Runner was used to secure everything down.

IMG_1399Here’s a peek of the finished box loaded with photographs from past adventures, with room for lots more! A great idea for those of us who have not printed out all our favorite photographs – now we have a place to put them!

IMG_1400Thanks you Tombow for your wonderful glues and Imaginisce for the amazing papers! Be sure to visit all the projects featured this week and leave a comment for your chance to win!  You also must ‘like’ both Imaginisce and Tombow on Facebook .

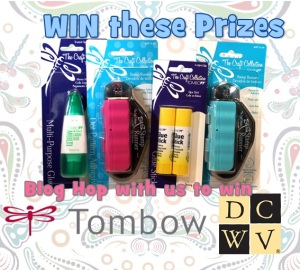
Imaginisce will be giving giving away a collection pack of the Outdoor Adventure Collection. The same one I used in this blog!

ImageLibrary126
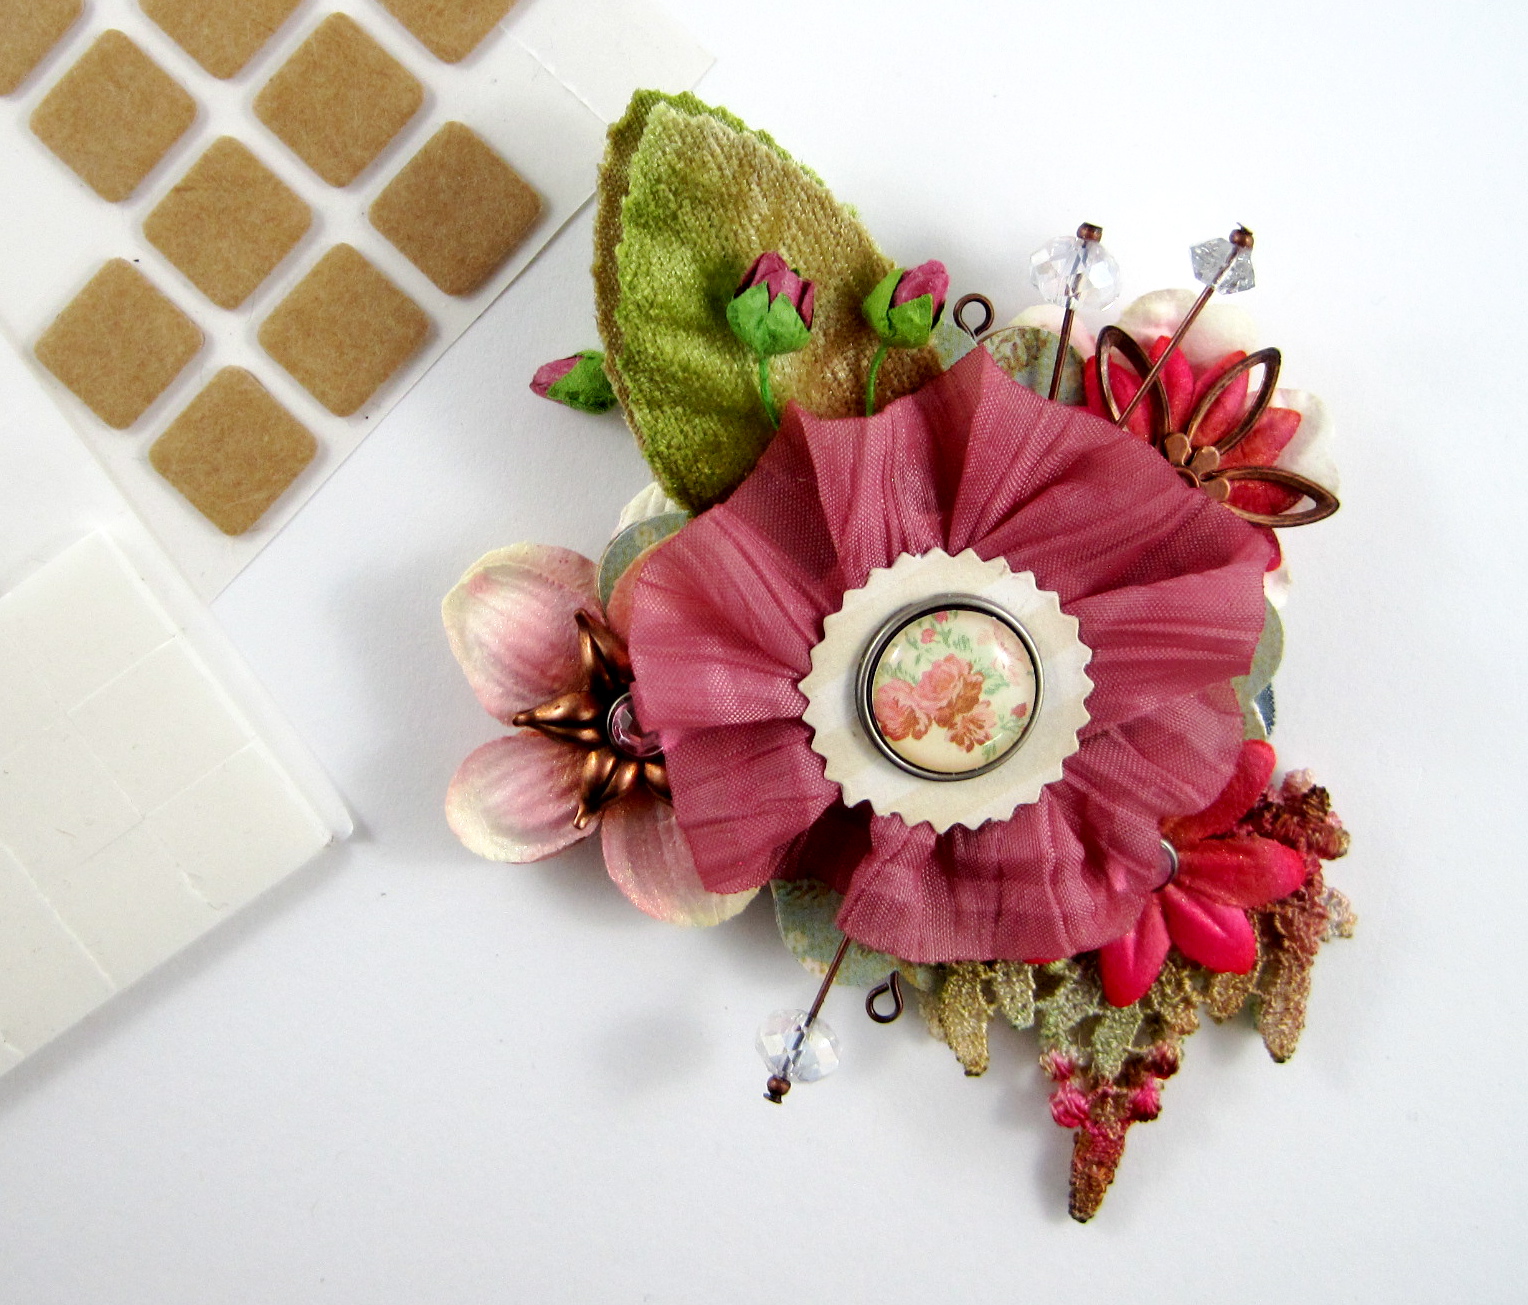
And one lucky winner will win an amazing package of Tombow products including Dual Brush Pen Set, 10 Jellybean, MONO Adhesive Dots Value Pack of 3 applicators, and Power Adhesive Tabs.

Bloghop_Imaginisce
Make sure you remember to ‘like’  both Tombow and Imaginisce to be eligible for the prizes and more you comment, the more chances you have to win!

Now, head on over to Michelle to see what kind of craftiness she has in store!

If you enjoyed this post please follow me on:

Facebook

facebo

Twitter

twitter


Chickadee Card March 22, 2013

Tombow bloghop

Hello Hoppers!

Welcome to the DCWV/Tombow Spring Fling Blog hop.

This week, DCWV and Tombow have teamed up to spread a little bit of spring fever. Both design teams are excited to show you just what we have done with the My Sunshine and Chickadee stacks from DCWV, and some amazing adhesive products from Tombow.

IMG_0621

This darling card was created using cardstock from the DCWV Chickadee Stack, Tombow’s Dual Brush Pens and Tombow Adhesives. I also colored chickadee peel-offs from Elizabeth Craft Design and added a silk bow from May Arts.

IMG_0617

What struck me the most with this beautiful double-sided cardstock was the wonderful color combination! I choose the following Dual Brush Pens to match the papers: N79 Warm Gray 2, 772 Blush, 755 Rubine Red, 993 Chrome Orange, 912 Pale Cherry, 312 Holly Green, 249 Hunter Green, and the colorless blender N00

IMG_0618

I used the indirect blending method by adding the Dual Brush Pen colors to the new blending palette and picking up and coloring with the colorless blender.

IMG_0619

To create the ruffled edge, I cut a second scalloped edge from the stack and applied MONO Multi Liquid Glue to the top of the strip, and Foam Tabs to the bottom.

IMG_0621

This detail shows the finished ruffle bottom. I also used this technique to attach the wing to the chickadee. The panels are attached using the Dot Stamp Runner Adhesive and the bow with a Power Tab. The great dimension in this card was created using the small and large-sized Foam Tabs. You can also stack the Foam Tabs for extra high dimension!

IMG_0631

Here are two more cards using the same techniques to show off the beautiful papers of this DCWV stack!

IMG_0620

VWP_0507signature-234

Be sure to visit all the projects featured this week and leave a comment for your chance to win!  One amazing package of Tombow Adhesive including NEW Stamp Runner Permanent Adhesive, NEW Stamp Runner, Dot Pattern Adhesive,  MONO Multi Liquid Glue, and MONO Glue Stick to one other lucky reader! DCWV will be giving away both the My Sunshine and Chickadee stacks to 2 lucky readers. The more you comment, the more chances you have to win!

Blog Hop_DCWV

Now, head on over to Karla’s Blog to see what kind of spring craftiness she has created!

If you enjoyed this post please follow us on


Bon Voyage Zipper Pulls March 5, 2013

My family has definitely caught the travel bug! Nieces, daughters and son off to new places to experience and explore! I thought of them as I made these travel zipper pulls that can be used on jackets, bags, key chains or backpacks – a perfect gift for a man or women. They were a snap to make using Epiphany Crafts Shape studio products. Wonderful ‘No Limits’ collection from Heidi Swapp and Tombow Adhesives were perfect to make a nice paper crafted holder for the travel zipper pulls.

After making the charms using the Epiphany Crafts Shape Studio Tool, Bubble Caps, and the images from Heidi Swapp ‘No Limits’ collection, I glued them into the Charm Settings using Multi liquid glue. That will make sure they stay together even with rough treatment! I then used a split ring (a jump ring would pull apart too easily) to attach them to a clip. Simple stuff!

I then mounted the zipper pulls into paper crafted matchbook style holders. This view shows the holder opened. I made a reinforced hole in the dark blue panel to hold the zipper pull and then mounted the panel using Foam Tabs. A Fastener Tab was used on the top flap to fasten the holder together.

This view shows the holders closed. I had great fun decorating the covers using the Heidi Swapp Color Magic Banners. Loved them! I simply colored the banners using the Dual Brush Pens and magically the resist patterns emerged! The colors of the Dual Brush Pens that match the Hedi Swapp ‘No Limits’ collection are as follows: 526 True Blue,555 Ultramarine, 837 Wine Red, 947 Burnt Sienna, 026 Yellow Gold and 992 Sand.

The banners were then adhered to the front panel using the Adhesive Dot Stamp Runner. The decorative accent on the flap was created by gluing a clear plastic cabochon to the decorative paper using the Multi Liquid Glue. When dry, cut out and glue to the flap with the Multi glue. The punched out “FLY’ circles were attached using Foam Tabs.

Until next week! Live creativity and carry lots of adhesive!

If you enjoyed this post please follow us on:
 

Birdcage Crystal Mobile March 3, 2013

This beautiful mobile combines paper crafting and basic jewelry making skills. What holds it all together are Tombow adhesives to form a decorative mobile to hang where a little vintage twinkle is needed.

Using the Caged Bird Die cut from Sizzix, cut out four birdcages from a dark brown cardstock. Trim off the center bar in the cage and adhere the cage down to decorative cardstock using Dot Adhesive Stamp Runner. The Dot adhesive is perfect for detailed cuts like the cage, it only deposits the adhesive onto the raised, cut areas making sure you get a secure bond with no messy bits exposed.

Cut the cages from the decorative paper and fold in half lengthwise. Using MONO Multi Liquid Glue, glue the folded pieces together. Before adding the last piece, glue in a loop pin to the top and the bottom of the cage.

To create a base for the floral piece, punch out two pieces. This is not really seen in the final piece, so you can chose any shape that measures around 2″ square. Using the Multi Glue, glue in two loop pins as shown, then glue the pieces together.

The floral embellishments are attached to the base using Foam Tabs and Power Tabs. I colored the paper flowers and lace piece with Dual Brush Pens and then spritzed with water to make the colors blend. The ribbon rosette was made using Multi glue and a Power Tab. The crystal pins were made by gluing crystal beads to head pins with the Multi glue.

The birds is made by gluing with Multi Glue two bird pieces together with a loop pin sandwiched in between. The bird is made 3-D by attaching the wings with Foam Tabs. Hang the mobile at this point to make sure all the pieces balance as you add them. Using chain, jump rings, charms and crystals from Connie Crystals, to make the dangling pieces. Attach them to the cage and the bottom of the floral piece.

If you enjoyed this post please follow us on: http://www.facebook.com/tombowusa and http://twitter.com/#tombowusa