Marie Browning

"Inspiring and honoring creativity"

Blog Hop with Guest Designer Diana Larson September 12, 2014


Welcome to the blog hop with guest designer Diana Larson! If you just came from Jennie’s Blog you are on the right track! if not, you may want to go back to the start at the Tombow Blog

IMG_1175

It’s harvest time! My bushes and trees are just loaded with fruit this year, grapes, apples and scarlet runner beans will be processed into grape jelly, applesauce and mustard beans this weekend! In honor of the harvest I made a quick DIY home project with pear shaped crystals from Connie Crystals and Tombow Adhesives! 

IMG_1171

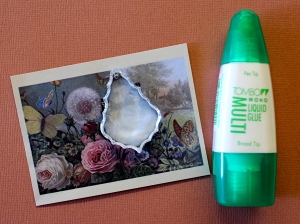
These are so simple to make! Add a little bit of the Mono Multi Liquid Glue onto the back of a crystal and place onto your image. Let dry crystal clear and trim away the excess paper.

IMG_1173

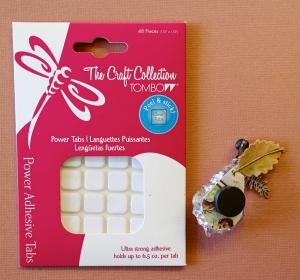
I hung some of the crystals on chain with a clip at the top to hang from lamps, use as fan pulls or just to display in a window. I think I may even put one in my car! I used 1/2 of a Power Tab to attach the velvet leaf onto the back.

IMG_1177

Some I made into magnets to use in my office on the filing cabinet. One Power Tab is plenty strong enough to attach the magnet to the back.

IMG_1172

Aren’t they great? I think they would make great gifts for friends at your office as well!

Blog Hop_DL

In order to qualify to win this amazing prize, Mono Aqua Liquid Glue and an Irojiten Color Pencil Sepia 5 set, please comment on each of the designer’s projects! The lucky winner will be announced on Monday Sept 15. 

Now go to our quest designer, Diane Larson’s Blog to see what fabulous project she has created for you! Happy Blog Hopping!

 

Blog Hop with Walnut Hollow August 15, 2014

Facebook-Post

Welcome to the Tombow and Walnut Hollow Blog Hop! If you just came from Jennie’s post you are on the right track! If not, you may want to start here to play along! 

IMG_0918

I am a huge fan of Walnut Hollow! They have beautiful wooden surfaces to decoupage and paint, like the recipe box I used here. This Basswood box is ready to use and made in the USA using sustainable wood. 

IMG_0921IMG_0922

I used Tombow’s Aqua Liquid Glue to cover the box with beautiful papers from the Burlap & Bouquets Collection from Fancy Pants Designs. The Aqua works extremely well for decoupaging paper onto wood. I simply cut the paper to size and then use the broad applicator to attach the papers for a smooth, wrinkle free bond. Talk about mess free, no brushes to wash! When dry, I use the Aqua to give the surfaces an all-over brushing. It dries clear and matte! The flowers motifs from the Burlap & Bouquets collection on the top of the box were applied the same way. COOK, EAT and BAKE using large alpha stickers from the collection were added when dry.  I also added a washi tape edge around the box rim for added embellishment. Don’t forget the final touches inside the box; recipe card dividers and a label with ‘FAMILY FAVORITES’ on the lid.

 IMG_0919

I used a Power Tab  to attach a clothespin to the lid for a handy recipe holder! 

Facebook-Post-prize

Here are the prizes that you can win! From Walnut Hollow a Shield Plaque, a Card Box and a Rectangular Serving Tray. From Tombow: Power Tabs, Foam Tabs and Xtreme Adhesive! Make sure to comment on all the projects to be eligible to win! Now go to Walnut Hollow to see what wonderful projects they have created! 


Blog Hop with Lily Criswell August 8, 2014

So happy to be blog hopping with guest designer Lily Criswell! Our amazingly talented guest is only 9 years old and already a seasoned designer! Play along and have a chance to win Tombow product! If you just came from Jennie’s blog, you are on the right track! If not you may want to start at the Tombow Blog. It’s also back to school time so Mom’s can celebrate by crafting this elegant pencil box – not for the children, it’s for you! 

IMG_0904I started by re-purposing a box I had. With some book pages and Tombow’s Aqua Liquid Glue I decoupaged on the sides and on the inside. Aqua Glue is a amazing glue for this purpose, and the build in applicator makes it mess free! I simply cut book pages to fit the sides and applied an layer of Aqua to attach. I also brushed on a coat of Aqua on top to give it a nice matte finish. Do you see the book page pencil? Yes, Aqua worked perfectly to cover the pencil as well! 

IMG_0905

I also added book pages on the inside – I didn’t worry about tears and wrinkles as I liked the distressed look! The ribbon handle and front label embellishment were added using Power Tabs for a strong, lasting hold. When dry I filled it with my essentials; Tombow Correction Tape, Xtreme Adhesive, Drawing Pencils and a Fudenosuke Brush Pen.  Now I’m all set to mark my fridge calendar with upcoming events!  

blank blackboard sign

Now to win a package of Soft Primary Irojiten Colored Pencils and Xtreme Adhesive please comment on all the Design Team’s projects as well as liking the TombowUSA Facebook page! Your next stop is Lily’s blog to see what she has created for you! 


Blog Hop with Tifany DeGough September 9, 2013

This week I am blog hopping with the amazing Tifany DeGough and the fabulous Tombow design team! If you just came from Jennie’s blog you are on the right track!

IMG_1769Here are some sneak peeks into my video projects I did featuring Tombow products for JoAnn’s in Akron, Ohio recently. We taped a series of six videos and when they are edited and uploaded I will share them with you! The production staff were a great group to work with!  I also received a very warm welcome from shuttle drivers, hotel staff and generally everyone I met in Ohio.  This photo shows a sparkly snowflake ornament that used Mono Multi Liquid Glue, Mono Aqua liquid glue, Foam Tabs and Power Tabs.

IMG_1745These pleated rosettes adorn a Vintage Bulletin Board and used Mono Multi Liquid Glue, Removable Adhesive and Power Tabs to create.

IMG_1752These brightly colored and template free containers are also created with Mono Multi Liquid Glue along with Dot Adhesive Stamp Runner and Power Tabs. These projects, complete with instructions, will be online soon! Make sure you follow JoAnn Store’s Facebook Page and me for these and many other creative projects!

Blog Hop_TGMake sure to comment on all the posts this week and win this great prize from Tombow! You could be the happy winner of Tombow’s Power Tabs, Mono Multi Liquid Glue and Dot Adhesive Stamp Runner! Now go to Tifany’s Blog to see what wonderful project she has created for you!

If you enjoyed this post please follow me on:

Facebook facebo

Twitter
twitter


“It’s Tombow time to get Fancy Pants” Blog Hop September 2, 2013

HGL_2028_CollectionPack_RGB_576x576_72pdiWelcome to the Tombow and Fancy Pants Blog Hop! If you just came from Tombow’s Blog you are on the right track! It was hard to pick from Fancy Pant’s new cardstock collections! I love them all! I choose the Happy-go-Lucky Collection for my card design, but I know I can use the other collections with the same design!

IMG_1793I come from a large family with lots of young adults. So when birthdays come along, it’s usually money or event tickets for their gift. I love to include a handmade card with a pocket inside. A folded flap with the sides adhered down with the Dot Adhesive Stamp Runner makes a nice, easy double pocket inside the card. On one side, a tag with the greetings and on the other, the folded money or tickets. I used the stickers, labels, border stickers and cardstock from the Happy-Go-Lucky collection, everything goes together perfectly!  Yes, that is a million dollar bill, I’m very generous…

IMG_1791The front of the card is decorated in the same manner using the coordinating papers and stickers. The focal point is a rosette cut using the Tim Holtz Rosette die from Sizzix. When cut, accordion fold and glue the ends together with Mono Multi Liquid Glue. You need only a small touch and it sticks together instantly and securely. After pushing down into the rosette, the Power Tabs, one for each side, holds it together perfectly and provides the means to stick it to the card.

IMG_1794Don’t forget to make a  matching envelope!

Blog Hop_FPMake sure to comment and like both Fancy Pants and Tombow to win this prize of a Dots Adhesive Stamp Runner, Power Tabs and Foam Tabs!

Fancy pants will also be giving away the new Happy-Go-Lucky Collection!

Your next stop: the Fancy Pants Blog!


Bragging Wallet August 19, 2013

IMG_1732

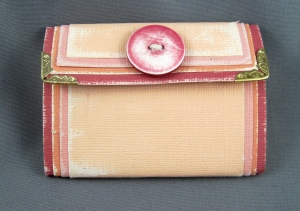
Thanks for joining us on the blog hop! If you have come here from Jennie’s blog you are on the right track! Here’s a small photo wallet I created to keep in my purse. For the cover, I layered graduated sizes of ColorCore cardstock from Core’dinations together using MONO Multi Liquid Glue. I loved how the colors created a pretty ombre effect and the multiple layers made a strong, practical cover to protect the photos. I used the Sanding Set to distress the papers and the button. The metal photo corners are attached with the MONO Multi Liquid Glue and the button is held on with a Power Tabs.

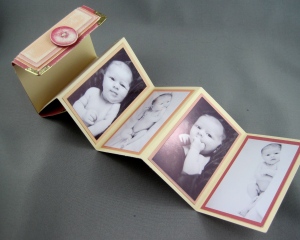
IMG_1735The concertina pages used the same colors for the panels and were attached using the Dots Adhesive Stamp Runner. The Dots Adhesive was also used to adhere the photos of cute little Lucy into the book. My new granddaughter – the reason for the brag book!

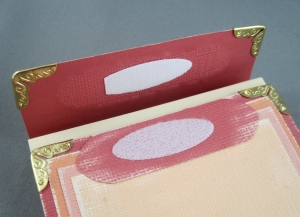
IMG_1737To hold the wallet closed, I used Fastener Tabs. They offer a low profile when working with paper and are very strong. The hook and loop type fastener can be opened and closed over and over again for many show-off sessions!

bloghop_LW

Be sure to comment to win! The more you comment, the more chances you have! Now, head on over to our guest designer Laura Williams to see what kind of craftiness she has created for us!

If you enjoyed this post please follow me on:

Facebook facebo

Twitter
twitter


Blog Hop with Tombow and Jaded Blossom by Marie Browning July 28, 2013

Ole! Welcome to my blog!

This week I am hopping with Tombow and Jaded Blossom

IMG_1682If you love to make sweet treats and packaged goodies for gifts and parties, Jaded Blossom is the go-to stamp company! As usual, everything is held together with my favorite adhesives from Tombow. I made a fun package to hold a Sweet ‘n Salty Rim for margaritas! Perfect to take to a summer barbecue. 

IMG_1680I made the package using coordinating papers from the Wonderful Day collection from Fancy Pants. I then matched the Dual Brush Pen colors to the paper and colored the cute ‘hot chili’ stamp from the Jaded Blossom Mexican Food set. I colored two images and used Foam Tabs to give it dimension on the package. Everything is held together using MONO Adhesive Dots.

IMG_1681I then used a Fastener Tab for the closure. It has a nice flat profile making them perfect for paper packages.

IMG_1682The embellishment on the raffia made from a stamp from the Friendly Candies Jaded Blossom Stamp set. Two were punched out and colored. Sandwich the raffia between the stamped circles and hold together using a Power Tab.

I also used a Power Tab to hold the clear bag with the Sweet ‘n Sour Rim mix to the inside of the package. To make the rim mix, simply add sea salt and raw cane sugar in a 50/50 mix. Pour out into a dish, rub a cut lime along the rim of your glass and dip into the mix. Add your margarita and let the fiesta begin!

IMG_1685
Tombow will be announcing a Winner tomorrow for this AMAZING Prize Package:
bloghop_JB
It includes:

Dual Brush Pen Set, 6 Jellybean

NEW Fastener Tabs

NEW Foam Tabs


VWP_0507signature-234

If you enjoyed this post please follow me on:

Facebook facebo

Twitter
twitter


Rose Card by Marie Browning July 8, 2013

This week we are blog hopping with guest designer Stacy Cohen! 

If you just came from Jennie’s blog you are on the right track!

This lovely card is created with the beautiful papers and scalloped blank card from Bazzill, a gorgeous rose stamp from Crafty Secrets, and the soft colors of Tombow’s Dual Brush Pens, Dot Stamp Runner and Power Tabs.

IMG_1454

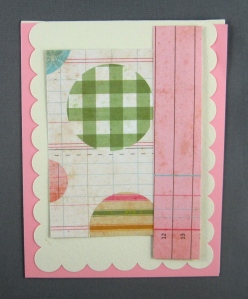
Create a simple collage by adhering paper pieces to the front of the card. A pink panel is also placed onto the inside front to emphasis the scalloped edge  The Dot Stamp Runner was perfect for the scalloped edge, as it applied the adhesive just where you want it with no excess mess! The stamping action helps by applying just a small square of adhesive in the middle of the panels to keep them secured.

IMG_1456

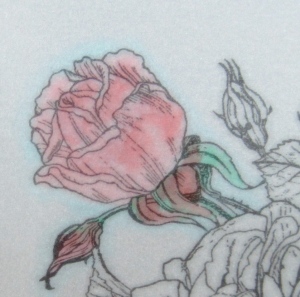
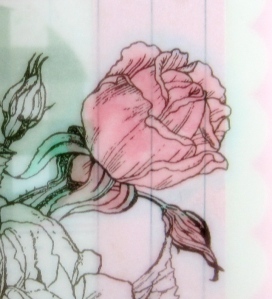
For coloring on the vellum, and after stamping your image, turn the panel over and color from the back. Using the Dual Brush Pens, I used two shades of pink for the blossoms and pink and green for the stems and leaves. I also used the light blue to color a halo around the entire image. You don’t have to worry about blending, just apply the color directly onto the vellum. The magic happens when you turn it around!

IMG_1457

The vellum and the collage underneath mute the coloring to create a soft colored image, making it a great fool-proof method for beginning card artists! The card if finished with a pretty tulle bow and a clear button attached using a Power Tab.

The more you comment, the more chances you have to win these great package of Tombow Products!
Now, head on over to our guest designer Stacy to see what she has created!

Bloghop_SC
VWP_0507signature-234

If you enjoyed this post please follow me on:

Facebook facebo

Twitter
twitter


Framed Drawing by Marie Browning May 13, 2013

Welcome to the Tombow Blog Hop! If you have come here from Jennie’s blog then you’re on track!

IMG_1298
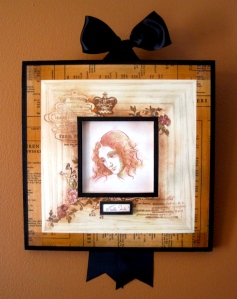
I had a small drawing (okay, a stamped and colored drawing!) that needed a frame. I found a nice broad-framed mirror from Ikea that I stamped, colored and decorated to display the little sketch.

IMG_1302

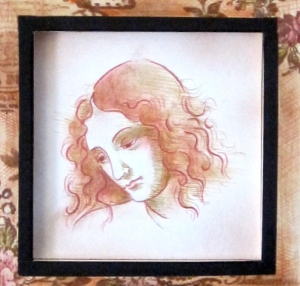
The drawing was simple – I used a favorite stamp from JudiKins and stamped the image onto drawing paper using a light gray stamp pad. I then used the Irojiten Colored Pencils from Tombow to color and add the decorative strokes. I used a varied stroke for the hair and crosshatching to shade.

IMG_1299

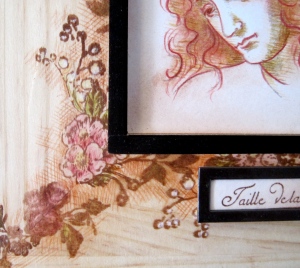
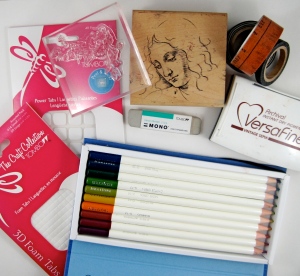
I then stamped the frame, right onto the raw wood, using a sepia stamp pad. I then colored the stamped images with the Irojiten Colored Pencils. It was amazing how beautifully they went on and how quickly a little color can add beauty to the finished look. I also used a colored pencil to add the crosshatching shading around the images to match the drawing. I used a Sanded Eraser to distress some of the stamping for a great antique look.    The frame was then finished by adding washi tape for the borders and a raised plate using Foam TabsA few Power Tabs held the black satin picture bow to the back of the frame securely.

IMG_1303

Be sure to visit all the projects featured this week and leave a comment for your chance to win!  We will be giving away an amazing prize pack of Tombow Dual Brush Pens Jewel 6 set, Mono Adhesive Removable, Mono Adhesive Permanent and our 3-D Foam Tabs.
The more you comment, the more chances you have to win!

bloghop_KW

Now head on over to Kristina Werner’s Blog and see what beautiful creation she has made for the hop!

The winner will be announced Friday May 17th  at 3:30 P.M. Eastern Time.

Thanks for joining us!

vwp_0507.jpgsignature 2

If you enjoyed this post please follow me on:

Facebook

facebo

Twitter

twitter


Penny Tap Shoes April 22, 2013

Filed under: Uncategorized — mariebrowning @ 3:00 am
Tags: , , ,

IMG_0792

This idea of gluing pennies to the bottom of your shoes for tap dancing has been on the internet for a while – but it was hard to find out exactly what adhesive to use that was strong enough to hold them tight, able to be removed and not damage your shoes.

I found the answer! Power Tabs from Tombow worked great! Make sure you wash off any dust or dirt from the bottom of your shoes (very important) let dry, then place down the Power Tabs. Adhere the pennies and voila! Instant tap shoes!

IMG_0793

I was thinking it would be great fun to start a ‘Tapping Tuesday’ day at work! It makes for a happy day tap dancing around the office! Kids love this as well! You just can’t help tip-tapping around when you wear them! Have fun and dance like there’s no one watching!

VWP_0507signature-234

If you enjoyed this post please follow me on:

Facebook facebo

Twitter
twitter