Marie Browning

"Inspiring and honoring creativity"

Blog Hop with Jen Goode! November 14, 2014

This weekend we are blog hopping with our guest designer Jen Goode! If you have just come from Jennie Garcia’s blog you are on the right track! If not, go back to the beginning on the Tombow Blog for a chance to win a fabulous prize set of Bright Tombow Markers!

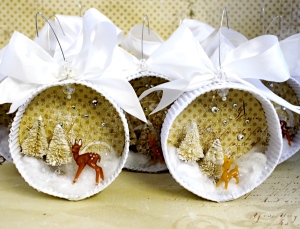
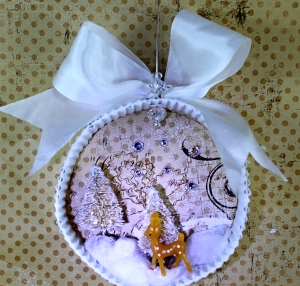
Do you have an ornament exchange party this season? Here’s a great project that I created and made 15 in 1 evening with the help of Tombow Adhesives!

IMG_1359

Here is the finished shadow box ornament.

IMG_1331

Here are the Tombow Products you will need:

  • Xtreme Adhesive
  • Mono Multi Liquid glue
  • Mono Aqua Liquid glue
  • Power Tabs
  • Dual Brush Pens to color stampings

IMG_1330

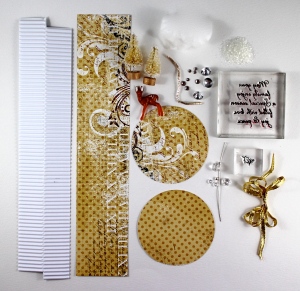
Here’s the supplies you need to make ONE ornament:

  • one 10″ x 2″ piece of corrugated cardboard – with 1/2″ notches at each end and scored in half (see photo above for grain direction)
  • one 10″ x 2″ and two 3″ circles cut from decorative cardstock  (paper from Bo Bunny)
  • one cotton ball
  • rhinestones – variety of sizes
  • glitter (Art Institute Glitter)
  • Scene elements – I used two miniature bottle brush trees and a deer
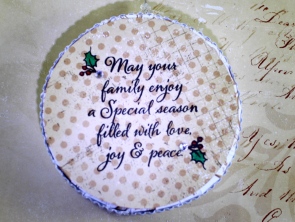
  • Stamps to add a sentiment to the back (sample from Stampendous)
  • Beaded hanger – 3″ headpin and beads
  • Ribbon Bow (I show a gold bow here but ended up using a white bow!) Ribbon from May Arts 

IMG_1332

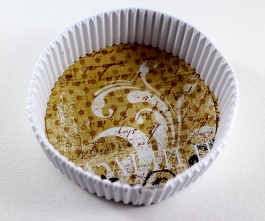
Step 1: Using the Xtreme Adhesive , (Xtreme is a perfect choice for quick, strong adhesion!) glue the decorative paper panel into the folded corrugated piece. Fringe cut the decorative paper every 1/4″

Step 2: Before going to the next step, stamp and color one of the circle pieces using the Dual Brush Pens.This will be the back of the ornament.

IMG_1333IMG_1362

Step 3: Form the shadow box into a circle and glue ends together using the Mono Multi. Use a clothespin to hold while drying. Fold in the fringes and using the Mono Multi, glue the circles to the inside and back to form the circular shadow box. With the shadow box made, I then glued in rhinestones on both sides using the Mono Multi (the fine tip is easy to control to make tiny drops of glue).

IMG_1363

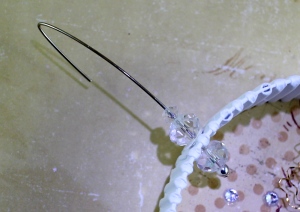
Step 4: Create the beaded hanger by punching a tiny hole at the top of the shadow box. Add some beads to the headpin, then place through the hole. Continue to add a few more beads. Add a tiny drop of Mono Multi Glue in-between each bead.  Fold the top of the headpin to form the hanger.

IMG_1354

Step 5: I added glitter to the trees by rolling them in a puddle of  Aqua Glue and then sprinkling on the glitter. (Aqua is my main go-to glue for adding glitter!) The glittery forest was so pretty!

IMG_1361

Step 6: Build your scene! Tear apart the cotton ball and drizzle some Aqua Glue on. Mix it gently by pulling the cotton apart and place into the shadow box (yes, I know, a little messy but Aqua washes away easily with a wet wipe).Glue in the trees and the deer with the Multi Glue. Sprinkle on some glitter and set aside to dry.

IMG_1364

Step 7: Add a bow to the top with a Power Tab and you’re finished! The Tombow Adhesives allowed me to speed through this project with great results! Make sure you ask Santa for your favorite Adhesives this holiday!

bloghop_jen Goode

In order to be qualified to win this amazing PRIZE,Tombow’s Dual Brush Pen Bright Set, PLEASE comment on each of the designers projects. We will announce a winner Monday, November 17. Now go to our guest designer Jen Goode’s Blog to see what she has created for you!
 

Parks and Recreation Blog Hop September 26, 2014

IMG_1239


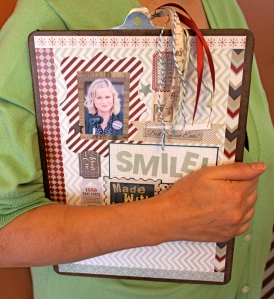
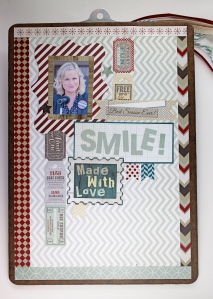
Welcome to Hydrangea Hippo’s Parks and Recreation Blog Hop! I created a personalized clip board; what every recreational programmer needs (especially if you have political aspirations!) using Fancy Pants’ Timbergrove Collection and Tombow Adhesives.

IMG_1242IMG_1243


I decorated both the front and the back of the clipboard with the papers and embellishments. I love when paper collections have everything you need to make it fun and simple to coordinate your project!

IMG_1244

To start, I covered both the front and back with paper using MONO Aqua Liquid Glue. It’s a perfect paper to wood glue that goes on smooth with no wrinkles. The photo, frame, tickets and smile panel were attached using the MONO Adhesive Dots Runner. 

IMG_1245

Any heavier embellishments, like this button on the metal clip, are attached using Xtreme Adhesive. This high performance adhesive is 5x stronger than standard tape runners!

IMG_1246

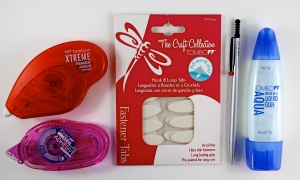
For that finishing touch, I attached a pen to the board using a Fastener Tab.  These hook and loop tags are ultra thin with a long-lasting grip that can be pulled apart and stuck together as often as you like. A very handy way to have your pen always at the ready! I used one of favorite Tombow pens, the Zoom 727 Ballpoint.

IMG_1238

Another quick and fun project using Tombow Adhesives!


Blog Hop with Walnut Hollow August 15, 2014

Facebook-Post

Welcome to the Tombow and Walnut Hollow Blog Hop! If you just came from Jennie’s post you are on the right track! If not, you may want to start here to play along! 

IMG_0918

I am a huge fan of Walnut Hollow! They have beautiful wooden surfaces to decoupage and paint, like the recipe box I used here. This Basswood box is ready to use and made in the USA using sustainable wood. 

IMG_0921IMG_0922

I used Tombow’s Aqua Liquid Glue to cover the box with beautiful papers from the Burlap & Bouquets Collection from Fancy Pants Designs. The Aqua works extremely well for decoupaging paper onto wood. I simply cut the paper to size and then use the broad applicator to attach the papers for a smooth, wrinkle free bond. Talk about mess free, no brushes to wash! When dry, I use the Aqua to give the surfaces an all-over brushing. It dries clear and matte! The flowers motifs from the Burlap & Bouquets collection on the top of the box were applied the same way. COOK, EAT and BAKE using large alpha stickers from the collection were added when dry.  I also added a washi tape edge around the box rim for added embellishment. Don’t forget the final touches inside the box; recipe card dividers and a label with ‘FAMILY FAVORITES’ on the lid.

 IMG_0919

I used a Power Tab  to attach a clothespin to the lid for a handy recipe holder! 

Facebook-Post-prize

Here are the prizes that you can win! From Walnut Hollow a Shield Plaque, a Card Box and a Rectangular Serving Tray. From Tombow: Power Tabs, Foam Tabs and Xtreme Adhesive! Make sure to comment on all the projects to be eligible to win! Now go to Walnut Hollow to see what wonderful projects they have created!