Marie Browning

"Inspiring and honoring creativity"

Blog Hop with the Frugal Crafter! October 24, 2014

IMG_1277

This week we are blog hopping with guest designer Lindsay Weirich, also known as the Frugal Crafter! I have a new DoodleDab for you, “Willow in the Wind” done in Autumn hues to accent a card. If you just came from Jennie Garcia’s blog you are on the right track. If not, you may want to start at the beginning here at the Tombow Blog so you are eligible to win the prize!

IMG_2538

IMG_1278

Here are the step outs for the DoodleDab. Remember to turn the paper so it’s easy to place the teardrop strokes. For the accent on the card I used the colors from the Dual Brush Pen Set, Muted Colors. 

IMG_1279

I added color to the photograph using a few matching colors of Irojiten Colored Pencils.

IMG_1281

The panels were attached using the Xtreme Adhesive and the photo panel popped up with Foam Tabs. I used my Envelope Punch Board to create a matching envelope. The Xtreme Adhesive is  perfect for constructing the envelope instantly and securely! Don’t forget to add more DoodleDabs to decorate the panel on the envelope!

Bloghop_FC

In order to be qualified to win this amazing prize, a Dual Brush Pen Set, Muted Colors, please comment on each of the designer’s projects. We will announce a winner Monday Oct. 27.

Your next stop is Lindsay’s blog, our guest this week to see what wonderful creation she has for you!


Debbie’s “You Are My Sunshine”Challenge July 14, 2014

Debbie has put out a challenge of “You are my Sunshine” to create something for summer and yellow! I haven’t shown a new DoodleDab lately, so here is a Sunny Sunflower using Tombow products! 

IMG_0755

DoodleDabs are created with the Dual Brush Pens. The tough nylon tips stand up beautifully  to  ‘dapping’ the brush tip down to create the teardrop stroke. This stroke is all you need to learn to make over 40 different DoodleDabs! Simply follow the steps to make the sunflowers using 925 Scarlet, 025 Light Orange  and 195 Light Green Dual Brush Pens. 

IMG_0758

Here is a panel showing a sunflower sprouting up to a tall sunflower and a friendly ant waving hello!

IMG_0756

IMG_0757

Don’t forget to accent the front of your envelope with some sunflower DoodleDabs!  I used Foam Tabs to raise up the main panel, MONO Dots Adhesive to attach the panels and rick rack and a light brown Irojiten Pencil to edge all the panels.

Want to learn more DoodleDabs? Stay tuned, my book “Brush Marker Magic” Design Originals Publication will be out soon and includes oodles of step-outed DoodleDabs!

Debbie_sunshinechallenge

I would be TRILLED if you tried out the DoodleDab while creating your entry for Debbie’s “You are my Sunshine” challenge! Look what you can win from Tombow: Xtreme Adhesive, Power Tabs and Mono Adhesive Dots! 


Heart Wing Butterfly DoodleDab February 6, 2013

Here’s a pretty little butterfly with heart shaped wings flown in just in time for jazzing up your love notes for

Valentines Day!

A quick review of how to make the teardrop stroke with the Dual Brush Pens from Tombow:

Teardrop Stroke: Using the brush tip, ‘dab‘ onto the paper to make the teardrop stroke. It’s that simple! Don’t make the stroke too small; you will not harm the tip by pressing down on it.

Brush Blending – for creating two-toned strokes – Use a sheet of clear plastic taped to a white piece of paper, for your blending palette. To make two-toned teardrop strokes, choose two colors, one darker than the other. Add a few strokes of the darker color onto the blending palette. Pick up this color with a lighter colored pen by dragging the pen through the color. Make the teardrop stroke and you will have magically created a perfectly blended two-toned stroke. You will find you can go far with just one load of color; you do not have to pick up more color for each stroke.

Heart Wing Butterfly

Start with a large dot made with the fine tip for the head of your butterfly. Make a teardrop stroke underneath for the body. Make the wings using the teardrop stroke, bringing the points together like a heart for the top set of wings. With the fine tip and a fine touch, add the antennae and the dotted flight path. For additional detail, add dots on the wings with a white gel pen or glitter pen.

I hope you can use this sweet tipnique to show you’re special someone how much you care. Until next time…Happy crafting…

If you enjoyed this post follow us on facebook and twitter!  http://www.facebook.com/tombowusa and http://twitter.com/#!/tombowusa


Lettering with Tombow January 5, 2013

In my large family nobody gets a birthday party by themselves! It also means I have to be ready with lots of cards and gifts when we have a party. I was a little behind in getting ready this month, so I was happy to pull out my Dual Brush Pens and quickly make plant signs and bag toppers. Lettering is a GREAT technique to have for these ’emergency’ creating sessions!

Here is my basket all packed up ready to take to the party – nine, yes nine gifts to prepare in one day!

These bag toppers have simple brush lettering with ant and centipede DoodleDab accents. The little centipede is shouting hooray! Depending on the recipient, the bags had chocolates, lottery tickets and money!

These Miniature Rose plants were beautiful – and perfect as gifts! I made simple plant signs using brush lettering and a Heart wing butterfly DoodleDab. The sign also used Stamp Runner Permanent Adhesive to put both the signs and bag toppers together.

They all look happy with their gifts!

See you in the classroom!


Tombow “Tip-niques” Holiday Flourish DoodleDab December 20, 2012

This easy DoodleDab is nice for adding a little holiday flourish on your projects. Use it to decorate an envelope, add it to a stamped image or even embellish the Christmas Dinner Menu.
 
The Tombow Dual Brush Pens I am using for this DoodleDab: 277 DarkGreen, 195 Light Green, 845 Carmine

Step 1: Using the fine tip of the Dark Green marker, draw a curved line for the main stem.

Step 2: Using the brush tip, add the Dark green to the blending palette. Pick the Dark Green up from the palette with the Light Green marker using the brush tip. This will create a two-toned leaf.

Step 3: Using the Teardrop stroke, add the leaves in bunches of three or five.
 

Step 4: With the fine tip of the Dark Green marker, add curls and stems.


Step 5: With the fine tip of the Carmine marker, add the berries. Leave a tiny white
dot uncolored to create the highlight.

Envelope Sample Embellished Stamped image

Detail of Menu Sample

I hope you have enjoyed this unique “tip-nique” there are many uses for this , I am sure you can find many of your own for upcoming holiday events. Until next time, Happy crafting……

If you enjoyed this post pleas follow us on http://www.facebook.com/tombowusa and http://twitter.com/#tombowusa


Harvest Grains DoodleDabs November 16, 2012

Here are some harvest grain DoodleDabs just in time to dress up table place cards, handmade cards or scrapbook pages during the holiday! I have included wheat, oats and cattail designs that are super easy to draw – just follow the steps and use Tombow Dual Brush Pens! As always, the colors I used are just a suggestion – you can choose from 96 glorious colors from the Dual Brush Pen collection! Dual Brush Pens have both a fine tip and a brush tip. Use the fine tip for the stems and any details that require a thin continuous line, such as the beards on the wheat grains. The brush tip is used to make the teardrop stroke, that creates the oat and wheat grains. The brush tip is also used to create the withered grass.

The grains can be bundled together or individually to create a harvest sheaf. Use them to accent your lettering, cards, envelopes or anything else that needs a quick autumn flourish.

What will you accent with the Harvest Grain DoodleDabs?


Monday’s “Tip-niques” ~ “Halloween Fun with DoodleDabs” October 8, 2012

Spooky Bat DoodleDab

To make the Spooky Bat, you need to learn how to make the Curve Stroke

with the brush tip of the Dual Brush Pen.

Spooky Bat loves to embellish a Halloween card, a frightful scrapbook page or even a ghoulish treat bag.

To make the Spooky Bat, you
need to learn how to make the Curve
Stroke with the brush tip of the Dual Brush Pen. Spooky Bat loves to embellish a Halloween
card, a frightful scrapbook page or even a ghoulish treat bag.

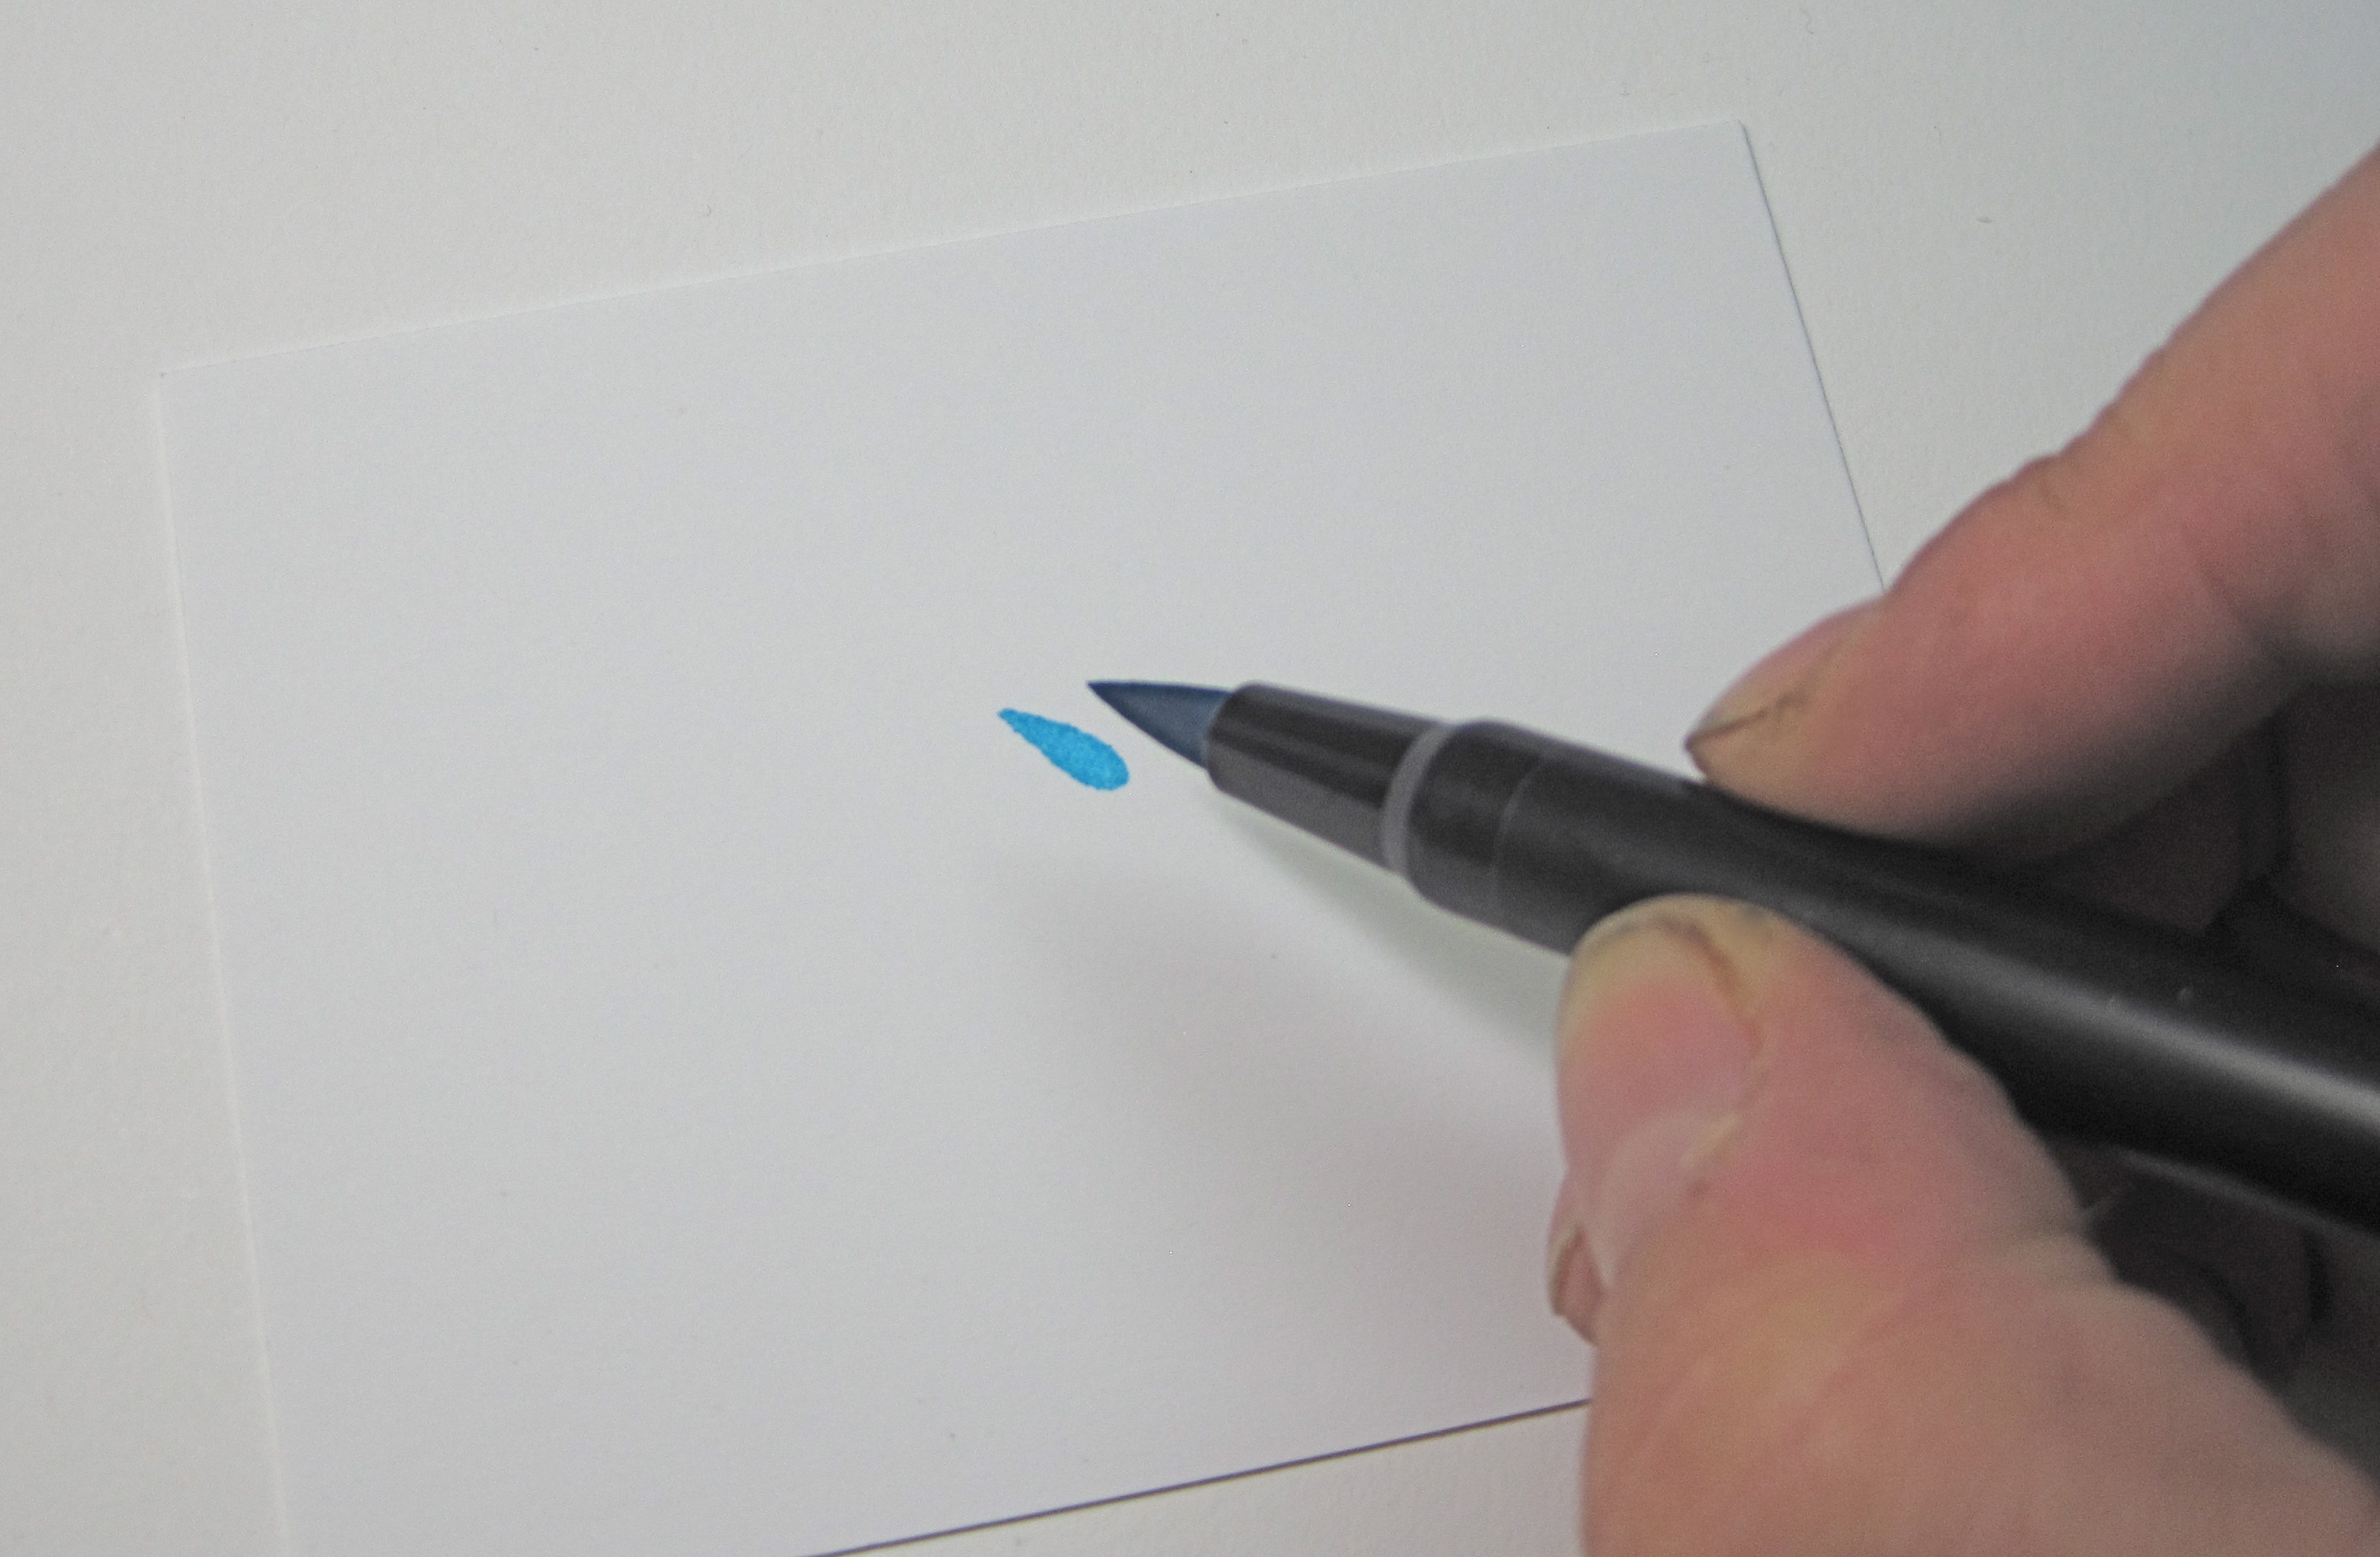
DoodleDab CURVE STROKE

Step 1. Start here with the point
of the brush tip and press down to start forming the stroke.

Step 2. Go in the direction of the
arrow, pushing on the brush tip a little more to make the stroke wider.

Step 3. Start to lift up the tip at
the end and off the paper to create the sharp point.
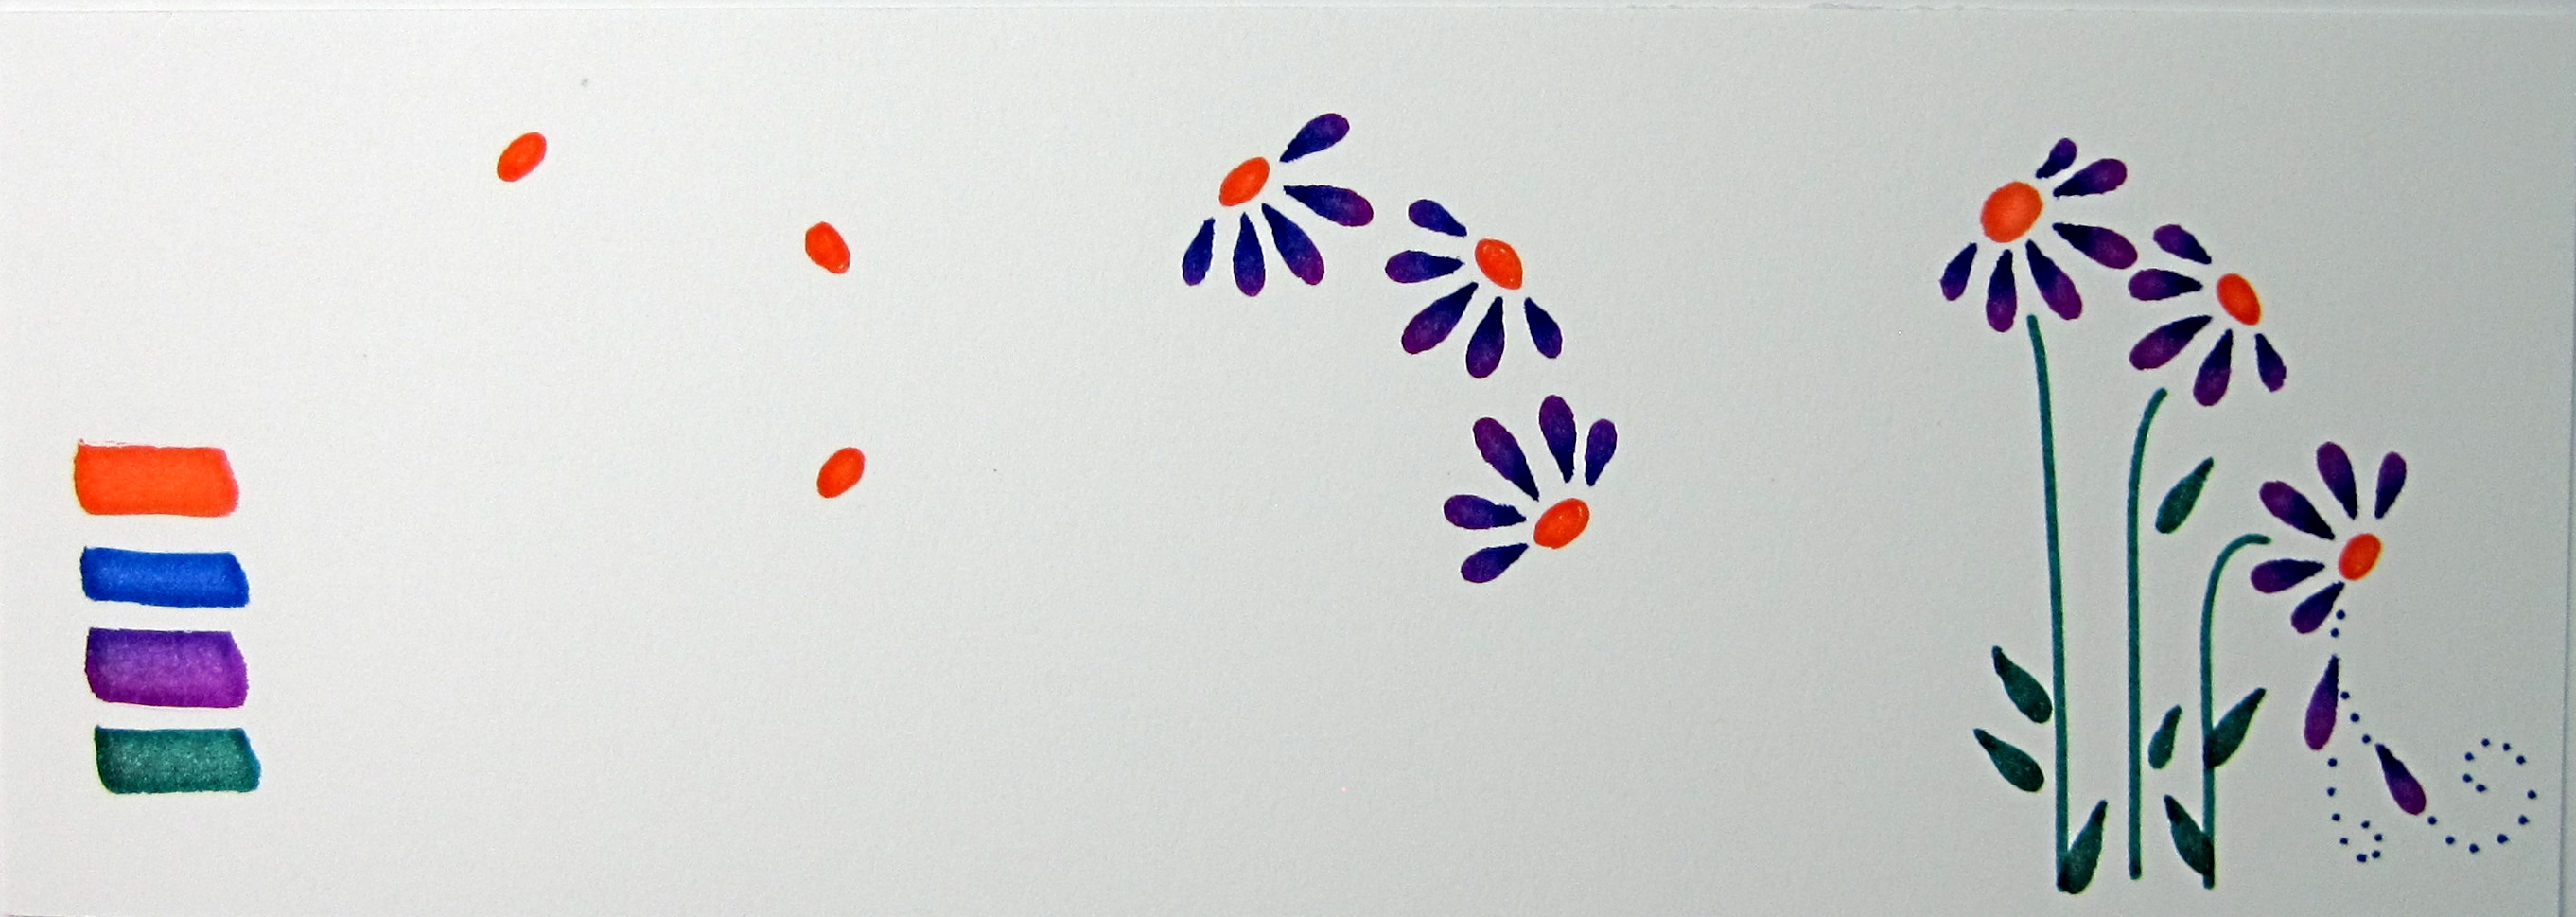
Step 4. Practice
making the curve stroke. Try making it smaller or larger.

Step 5. After you
are happy with your stroke, make it in the opposite direction! It’s a little
easier to draw the left to right curve stroke if you angle your paper slightly.

DoodleDab
SPOOKY BAT

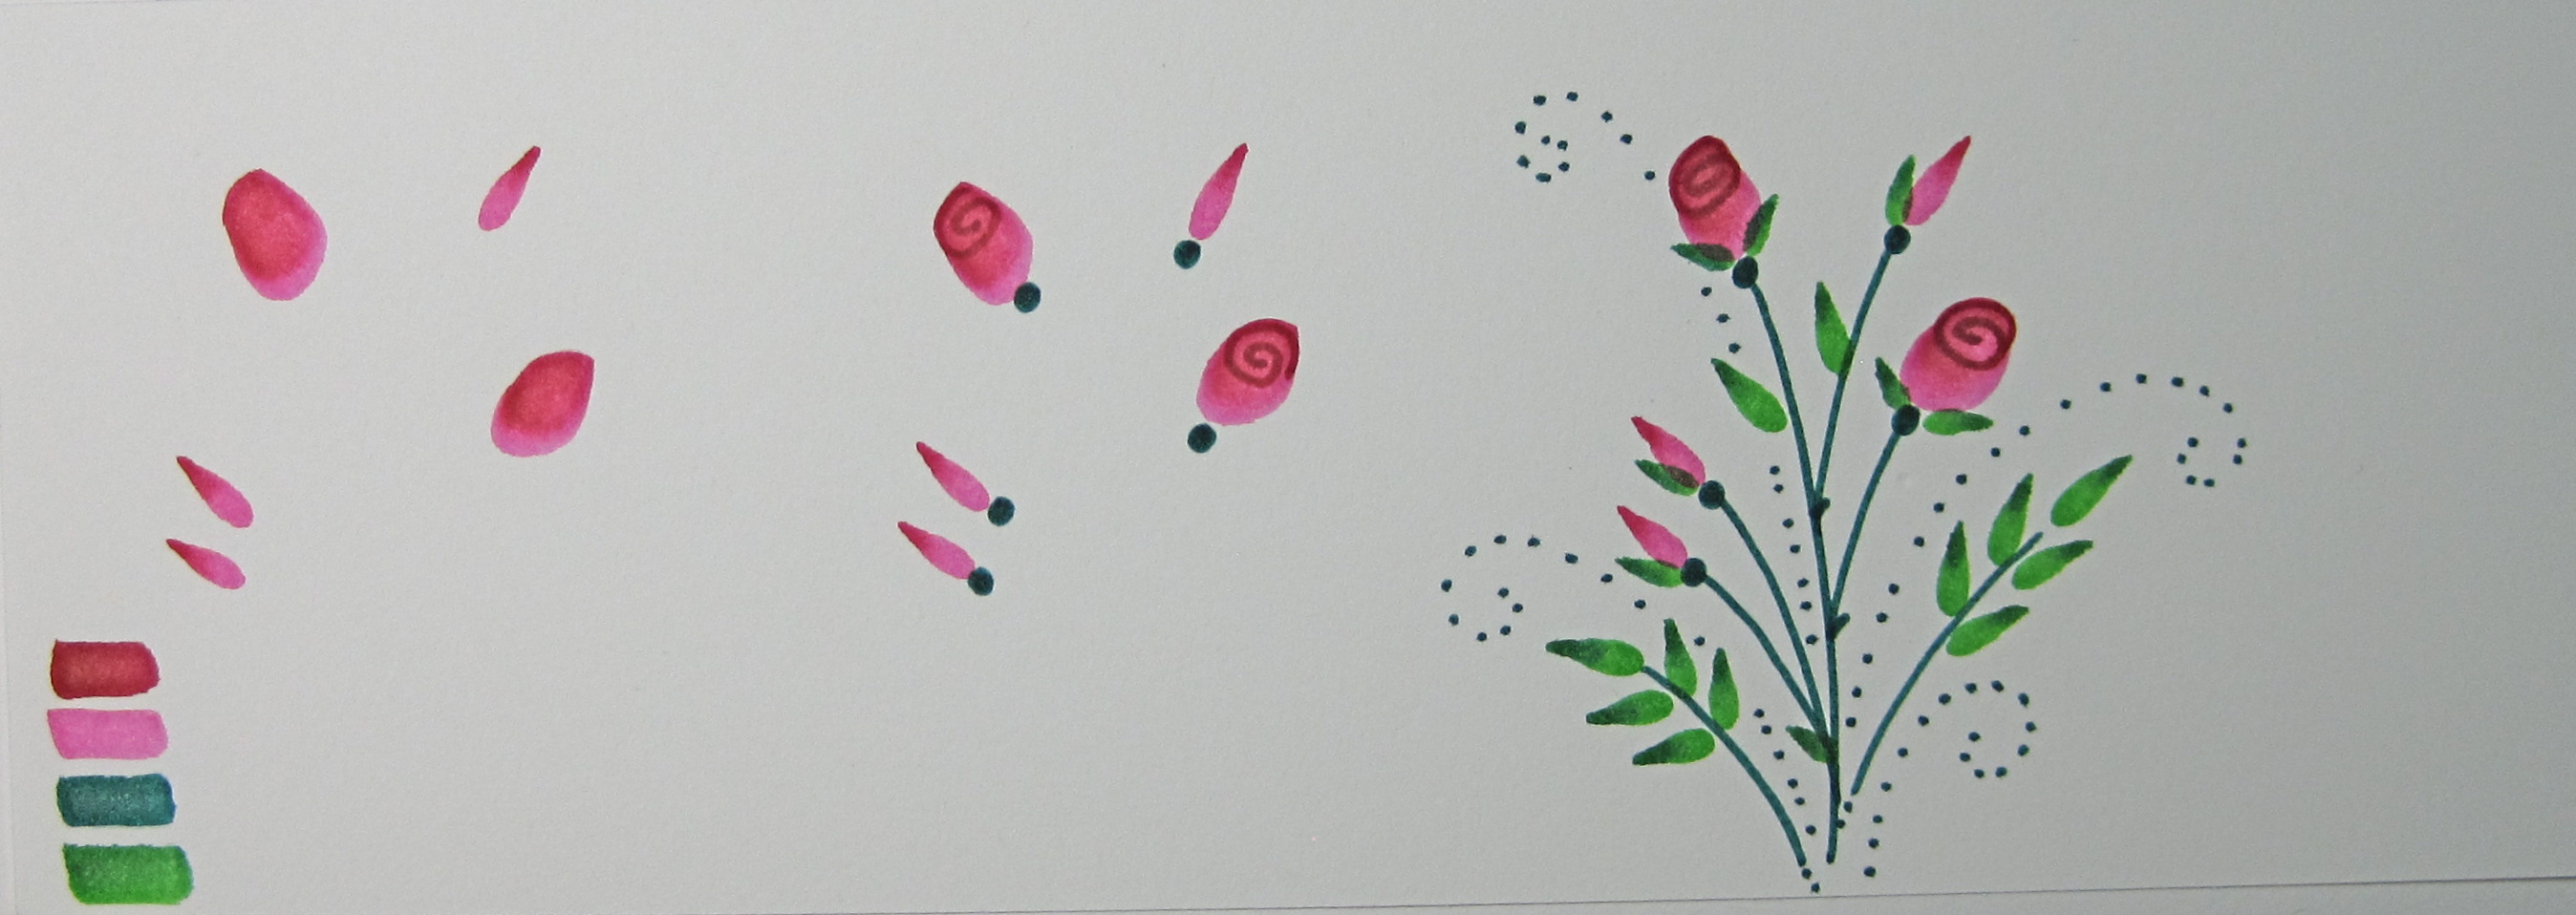
Step 6. Start the Spooky Bat by making two mirror-image curve strokes

Step 7. Add smaller curve strokes to each side to form the wings.

Step 8. Add tiny teardrop strokes for the ears

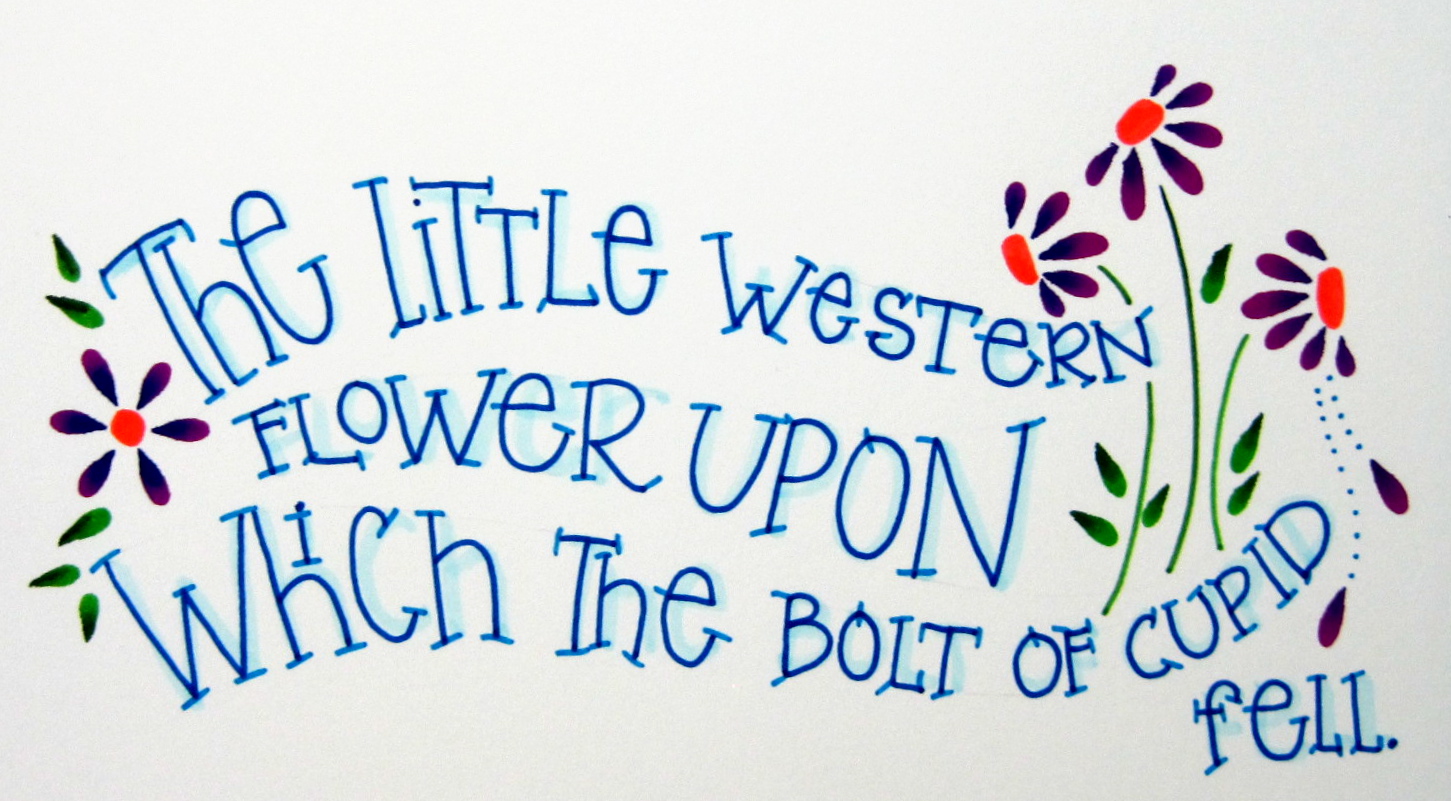
Step 9. Using the fine tip of the pen; add eyes, feet and little curls on
the top of the wings – makes them look a little bit more vampir-ish!

Spooky Bat can have a dotted flight path or little movement marks for their flapping wings. He also comes in
lots of spooky colors. Spooky Bat also likes to hang around the bat cave. Turn the paper upside down when drawing Spooky Bat sleeping in the cave.

and here’s another….

Cute Spider DoodleDab

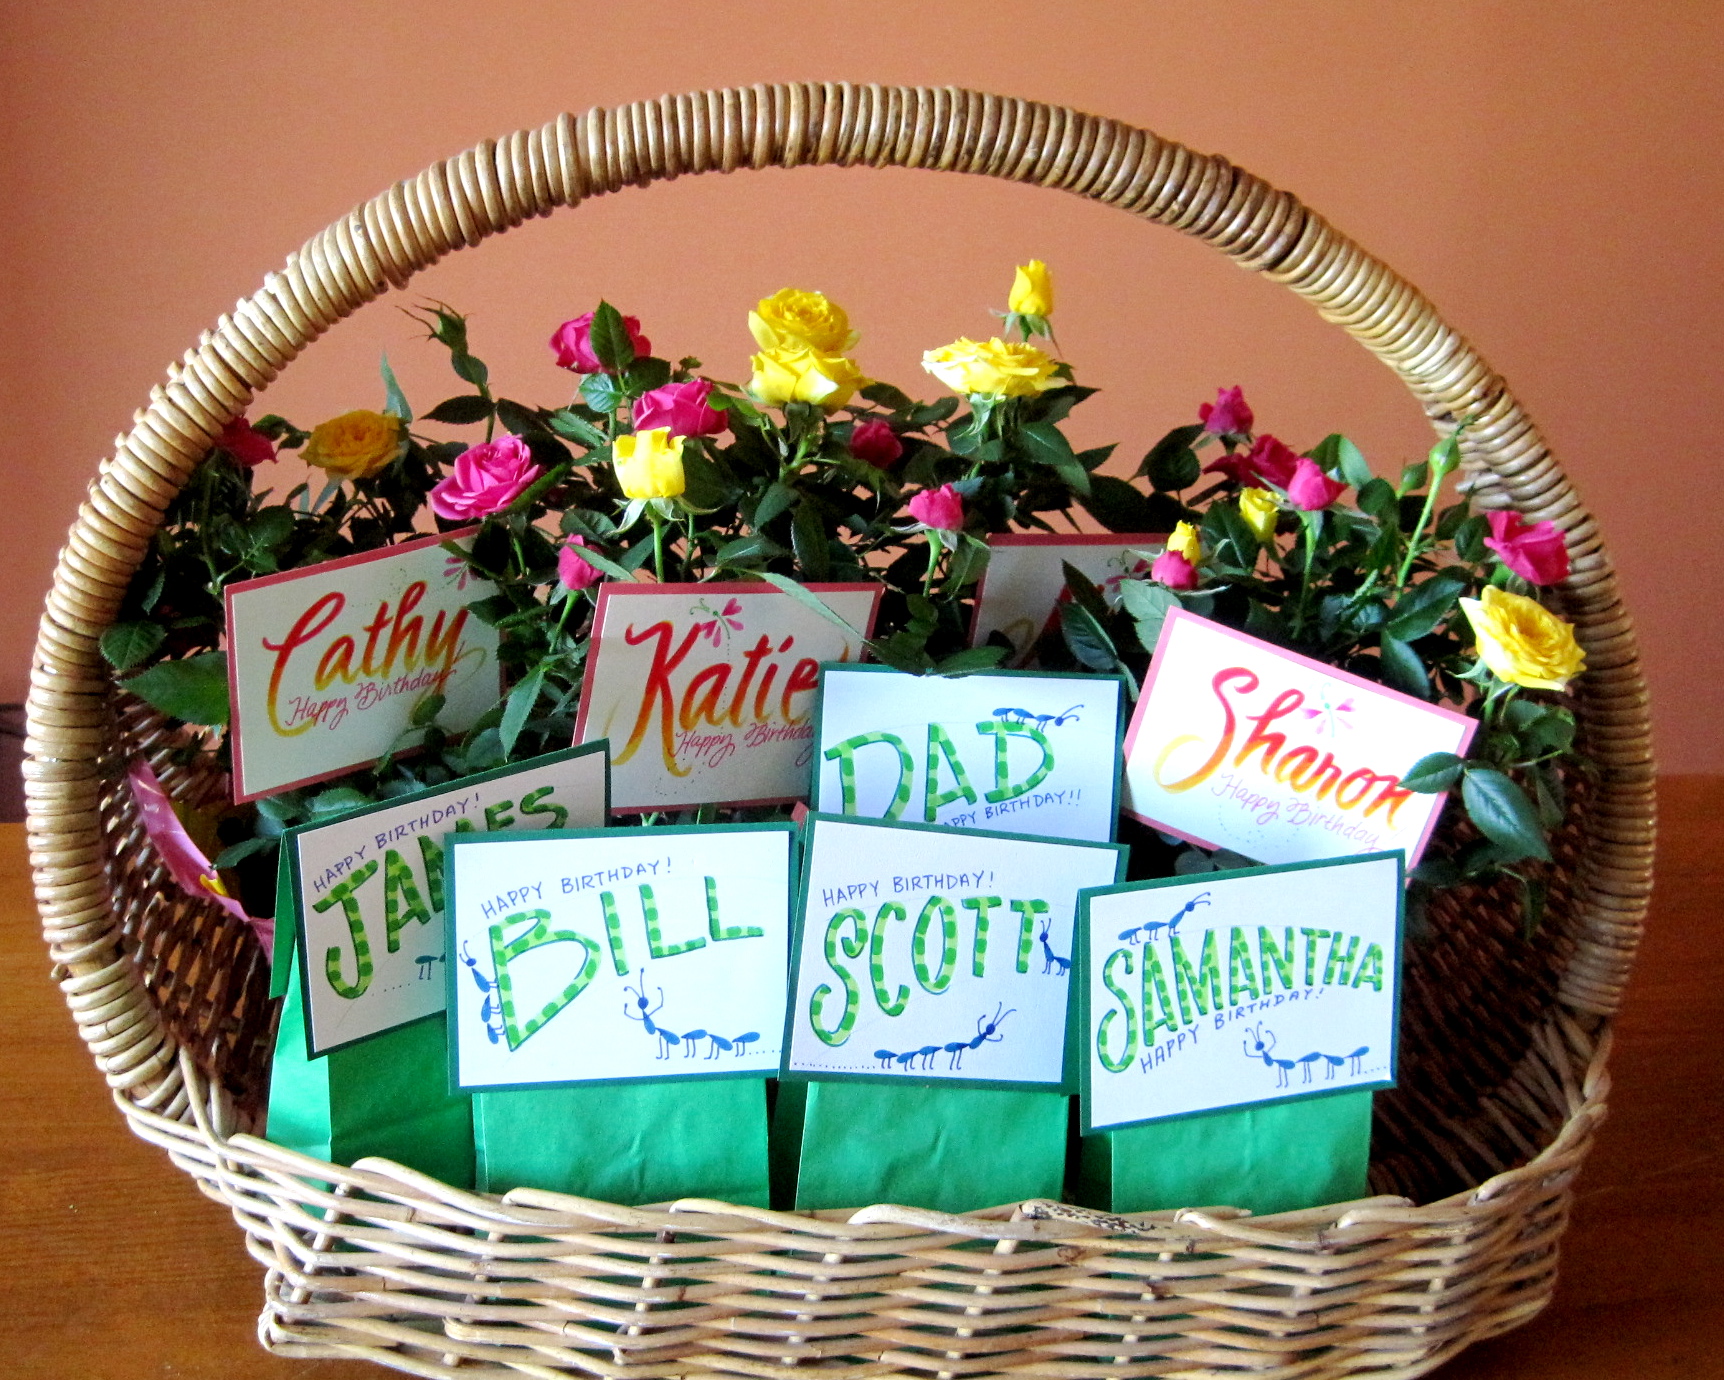
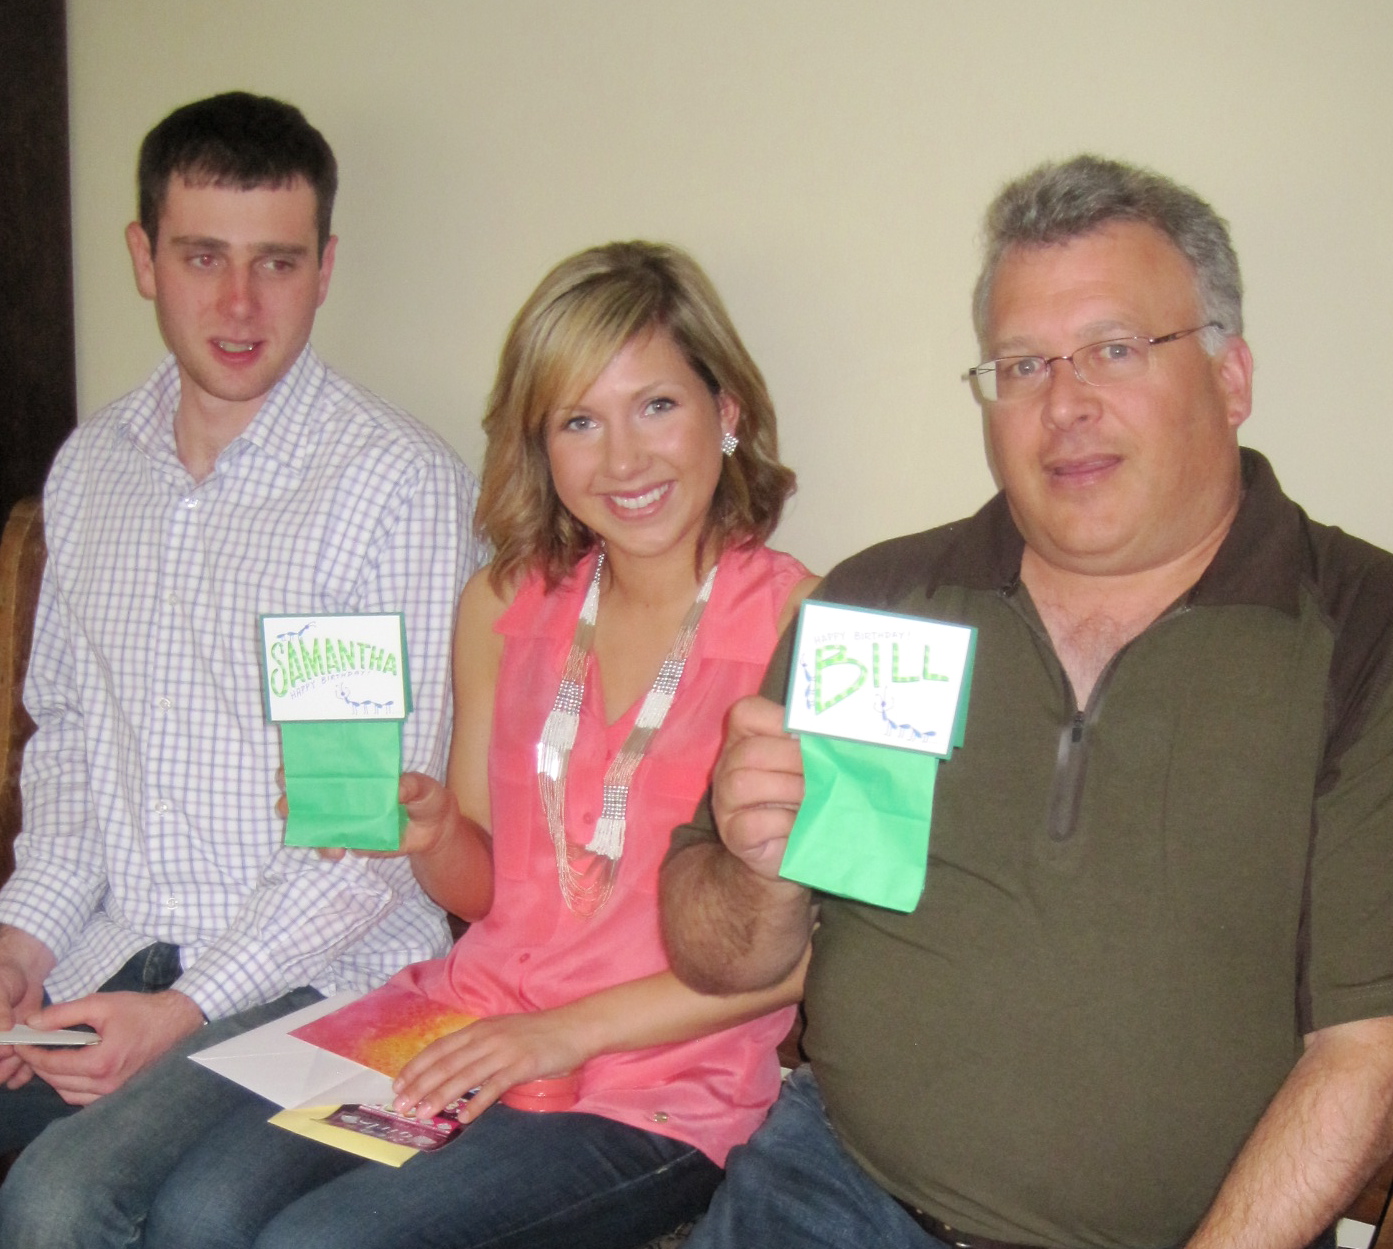
These inexpensive treat sacks are so easy to make the whole family can help. Fill them with your favorite homemade treat to delight any trick or treater!
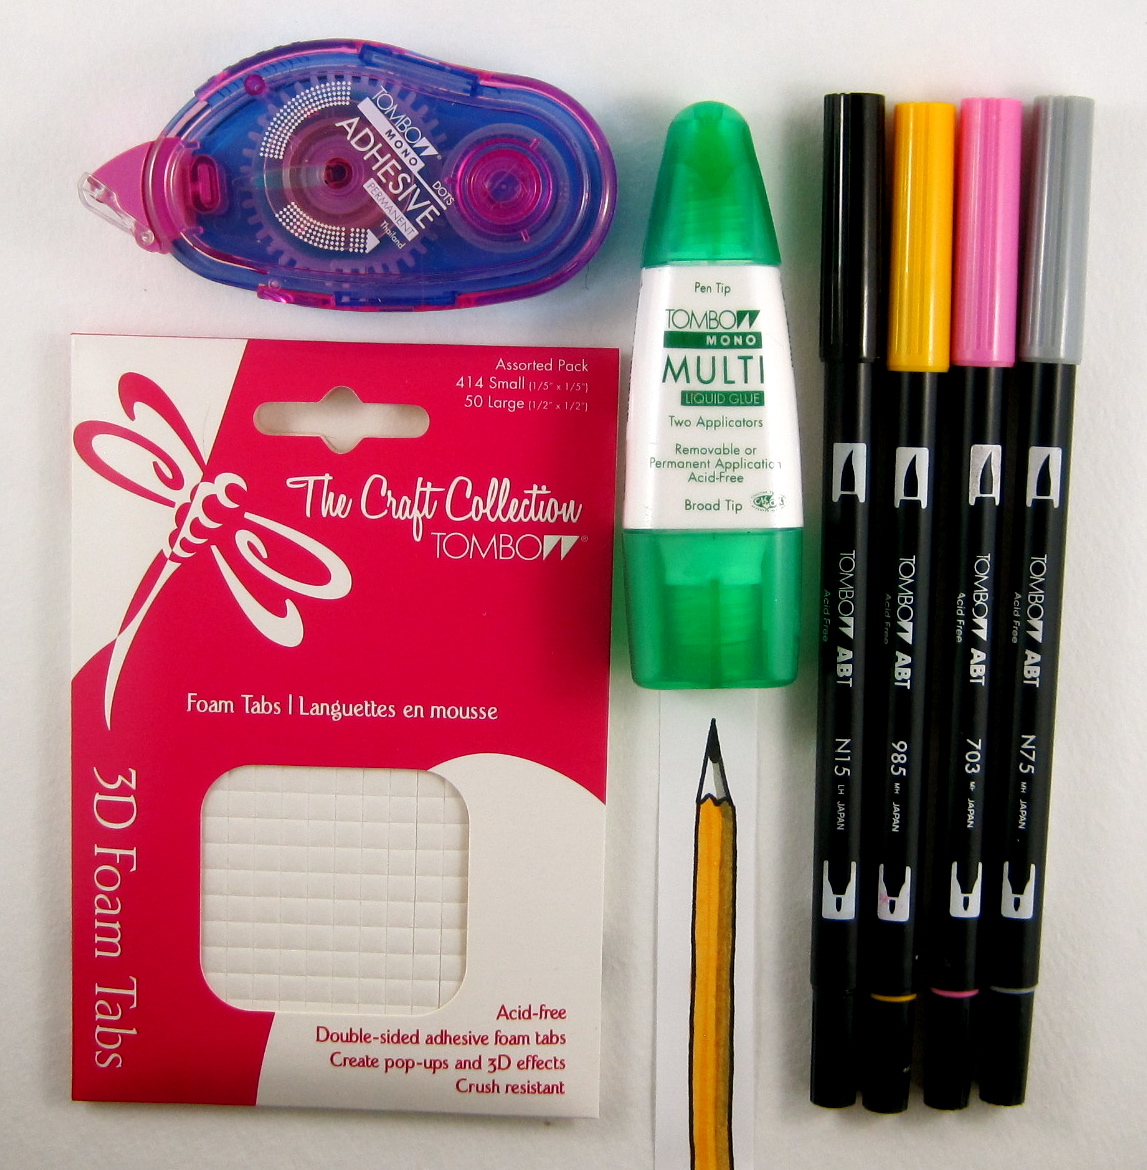
Materials:

Tombow Dual Brush Markers ~ 606 Violet, 177 Dark Jade, 603 Periwinkle, N60 Cool Gray 6, and 133 Chartreuse. Tombow MONO Multi Liquid Glue, Tombow MONO Adhesive Tape & Power Bond.
• White Paper Sacks – Large size: 4 5/8 in x 2 7/8 in x 8 5/8 in, Small size:3 1/2 in x 2 in x 6 3/4 in
• Wax paper • Water spritzer bottle • Silly Spiders Velvet Black Stickers ByStampendous! • Black 9 mm Chenille Stems • Black Boa, 6 ft. • Multicolored Wiggle Eyes, 10 mm

Directions:

Step 1. On wax paper, scribble the green and purple brush markers using the large brush

point. Spritz a little water onto the colors to make them blend slightly. Lay the

paper sack down into the color and press. Lift and lay face up to dry. Repeat with all the sacks.

Step 2. Place the spider stickers onto the front of the sacks. Use the photo of the samples for placement.

Hint: The stickers are easier to lift off the sheet with a
pair of tweezers.

Step 3. With the black Brush Marker, add spider silk to hang the spiders and the lined boarder.

Step 4. With the gray Brush Marker, add the shadows to the spiders and webs.

Step 5. Place the treat into the bag and fold over the top. Bend a chenille stem (12 in for

large bag, 9 in for small bag) into a U shape and staple to the top of the bag.

Step 6. Add a piece of the feathery boa ( 3 1/2 in for small bag, 4 1/2 in for large bag) to

the top of the bag using the adhesive tape.

Step 7. Finish the bag by gluing in two wiggle eyes to the boa with the Multi liquid glue.

I hope you enjoyed this “Tip-nique” see you again next Monday with more fun and fabulous “Tip-niques”

Thanks…..

If you enjoyed this post please follow us on
http://www.facebook.com/tombowusa and http://twitter.com/#tombowusa
 

New Pencil DoodleDab September 11, 2012

Here’s a fun new DoodleDab to celebrate the start of a new school year. It’s amazingly easy to do using Tombow’s Dual Brush Pens!

The Pencil DoodleDab is great for creating fun cards, notepaper or to decorate your envelopes. Here’s how to draw the Pencil DoodleDab:

General: The suggested Dual Brush Pen colors are shown on the right.

1. Start by making a line using the yellow marker’s brush tip. Make it as long as you want your pencil to be.

2. Add two more lines one each side of the first line, overlapping as you go.

3. With the brush tip of the black marker, make a teardrop stroke about 1/2″ away from the barrel of the pencil.

4. With the fine tip of the black marker, draw lines from the point to the sides, add a wiggly line on top of the barrel, outline the sides and bottom of the barrel, add three short, slightly curved lines at the bottom and draw a square at the base for the eraser. Color in the eraser with the pink marker.

5. This step is optional. Add a shadow to the side of the pencil with the grey marker’s brush tip. You can also use the grey marker’s fine tip to add “HB Pencil” to the barrel if you wish.

Have some fun using some the 96 different colors available in the Dual Brush Pen selection! The cards were put together using Dot Adhesive, MONO Multi Liquid Glue, and Foam Tabs.

Thanks for dropping by! Please comment if you like the new Pencil DoodleDab!


Rose DoodleDab June 1, 2012

June is for Roses! So here is the Rose DoodleDab for you to create with Tombow’s Dual Brush Pens. They are a great way to add a beautiful embellishment to a card, a gift tag or the front of an envelope. I love to use them to embellish stamped images or Dual Brush Pen lettering.

Follow these steps to create a Rose DoodleDab using the following colors: 703 Pink Rose, 725 Rhodamine Red, 195 Light Green, 346 Sea Green

1. Make a two-toned oval stroke for the rose and two-toned teardrop strokes for the rosebuds using the brush tip. Want to watch how to make these strokes? Click here for a YouTube video of me creating the Rose DoodleDab.

2. With the fine tip, add a small circle under each blossom.

3. Add the stems using the fine tip. Using the brush tip, add two-toned leaves. Finally, add the ‘aphids’ (curly dots!) with the fine tip.

Here is sampling of Rose DoodleDab variations

Samples of Rose DoodleDabs embellishing a stamped image and Dual Brush Pen lettering. Join me next Monday for a beautiful Birdcage Crystal Mobile.

If you enjoyed this post please follow us on: http://www.facebook.com/tombowusa and http://twitter.com/#tombowusa
 

Daisy DoodleDab May 7, 2012

Here’s another DoodleDab made with Tombow Dual Brush Pens! This super easy DoodleDab is a wonderful accent for your lettering, to decorate an envelope or to doodle onto a card. Sunny and bright, they can embellish all your spring paper crafts!

Here’s a reminder of the steps for making a DoodleDab. To make the teardrop stroke, simply press the brush tip to the paper. You can push hard to make a good size stroke, the flexible tip is strong and will hold up stroke after stroke.

To make a two-toned stroke, place the darker color onto a plastic palette. Pick up with a lighter color. Now when you make the teardrop stroke you will magically have a perfectly blended two-toned stoke!

For the Daisy DoodleDab I am using the following Dual Brush Pens: 925, 555, 685 and 195. Start by making small ovals with the fine tip of the orange marker. Make two-toned strokes using the dark blue and purple markers. Start in the middle of the flower center and add the petals, making them smaller as you move out to the sides. With the fine tip of the green marker, add the flower stems. Make two-toned leaves using the dark blue and green markers. I also added a few falling petals and curly dots as accents.

Here’s a sample of the daisy DoodleDabs accenting some lettering.

Have fun DoodleDabbing!

Next week, blending with Irojiten Colored Pencils!

If you enjoyed this post please follow us on http://www.facebook.com/tombowusa and http://twitter.com/#tombowusa